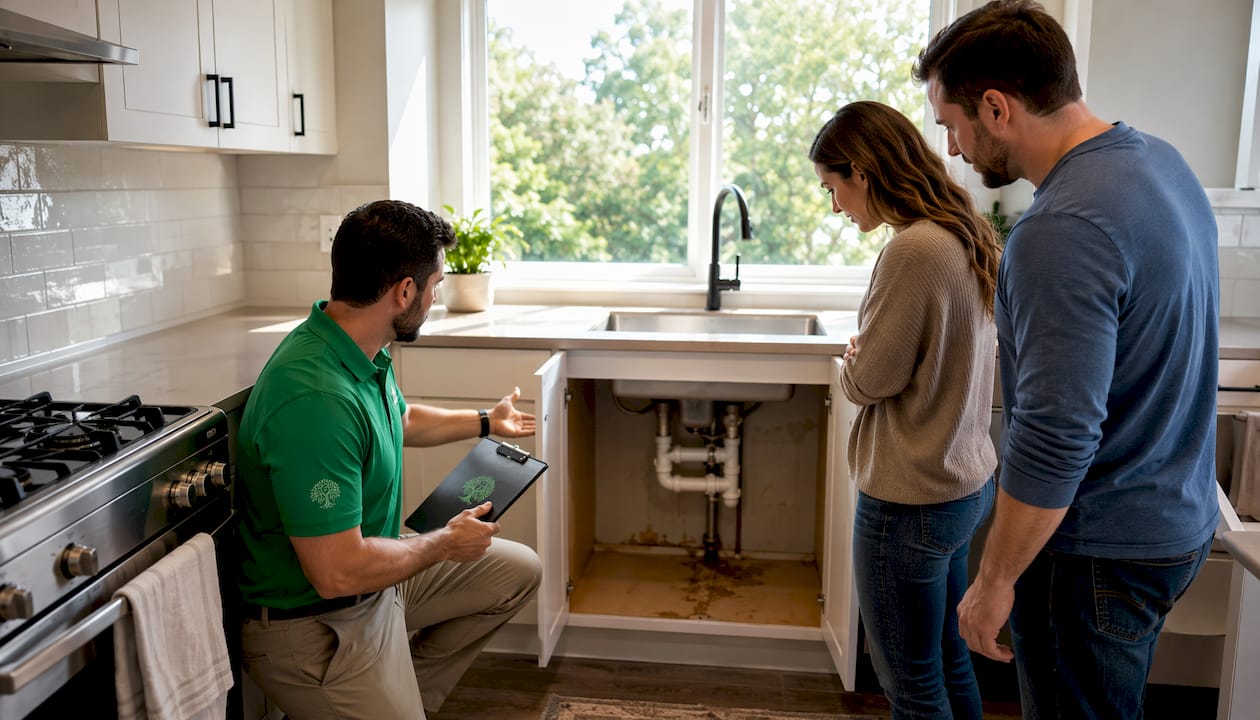
A home inspection contingency is a clause in your purchase contract that gives you a defined window to hire a professional inspector, review the findings, and then renegotiate or walk away without losing your earnest money. It is one of the most important protections in any residential purchase agreement, and understanding how it works before you make an offer puts you in a far stronger position.
Here is what the contingency typically gives you:
- The right to inspect the property, request repairs or a closing credit, or cancel the contract within the inspection period (usually 7–14 days from offer acceptance), with your earnest money returned if you cancel within that window.
- A defined seller-response window (commonly 3–7 days) after you submit any repair or credit request.
Pro Tip: In a competitive market where sellers resist contingencies, ask your agent about an informational inspection. You hire the inspector, learn the home’s condition, and signal to the seller that you will not be requesting repairs or credits. It is a middle path that keeps you informed without weakening your offer.
Table of Contents
- What is a home inspection contingency in a purchase contract?
- What does a standard home inspection actually cover?
- How does the inspection contingency work, step by step?
- What are your options after the inspection comes back?
- Should you waive the inspection contingency?
- How do you pick a qualified home inspector?
- What does a home inspection cost, and what are the biggest red flags?
- Practical tools: sample clause, buyer checklist, and next-steps workflow
- A negotiation script and timing guide for first-time buyers
- Key Takeaways
- The inspection contingency is not a guarantee, and that gap matters
- How Ficustree helps you navigate inspection contingencies
- Useful sources for buyers who want to go deeper
- FAQ
What is a home inspection contingency in a purchase contract?
A home inspection contingency is a condition precedent built into your offer. The sale cannot proceed on its current terms until the condition is satisfied or waived. If the inspection reveals problems you cannot accept, you have a contractual right to cancel and recover your deposit, rather than being forced to close on a property with hidden defects.
Most standard contracts include one of these variations:
- Unconditional inspection contingency: You can cancel for any reason discovered during the inspection period, no questions asked.
- Inspection with repair cap: You can only cancel or renegotiate if repair costs exceed a specified dollar threshold (for example, $5,000).
- Informational inspection: You complete the inspection for knowledge only and waive the right to request repairs or credits.
- Defined seller-response window: The contract specifies how many days the seller has to respond to any repair or credit request before you can cancel.
The language in your contract determines which variation applies. A typical clause reads something like:
That single paragraph is what stands between you and a surprise $30,000 foundation repair bill after closing. Read it carefully, and make sure the number of days and the cancellation terms are clearly stated before you sign.

What does a standard home inspection actually cover?
A licensed home inspector evaluates the visible, accessible systems and components of the property. The inspection is not a warranty, and it does not guarantee the home is defect-free. It is a professional assessment of condition on the day of the visit.
Typical scope includes:
- Structural components: foundation, framing, floors, walls, ceilings, and roof structure
- Roof covering, gutters, flashing, and visible attic space
- HVAC systems: heating, cooling, and ventilation
- Plumbing: supply lines, drains, water heater, and visible fixtures
- Electrical: panel, wiring, outlets, and safety devices (GFCI, AFCI)
- Windows, doors, and exterior cladding
- Visible moisture intrusion or water damage
- Safety items: smoke detectors, carbon monoxide detectors, handrails, and egress
Common exclusions (require separate specialists and fees):
- Termite and pest inspections
- Septic system or well testing
- Radon, mold, or asbestos testing
- Sewer scope (camera inspection of the drain line)
- Roof certification or engineering reports
The inspector delivers a written report, usually within 24–48 hours, with photos and a breakdown of major versus minor findings. You will walk through the property with the inspector during the visit, which is the best time to ask questions about anything that concerns you. For a deeper look at what inspectors flag most often, the home inspection secrets guide covers common pitfalls buyers miss.
Pro Tip: Always attend the inspection in person. Reading a report is useful; watching the inspector point to a cracked heat exchanger or a panel with double-tapped breakers is unforgettable. You will understand the severity of issues far better when you see them firsthand.
How does the inspection contingency work, step by step?
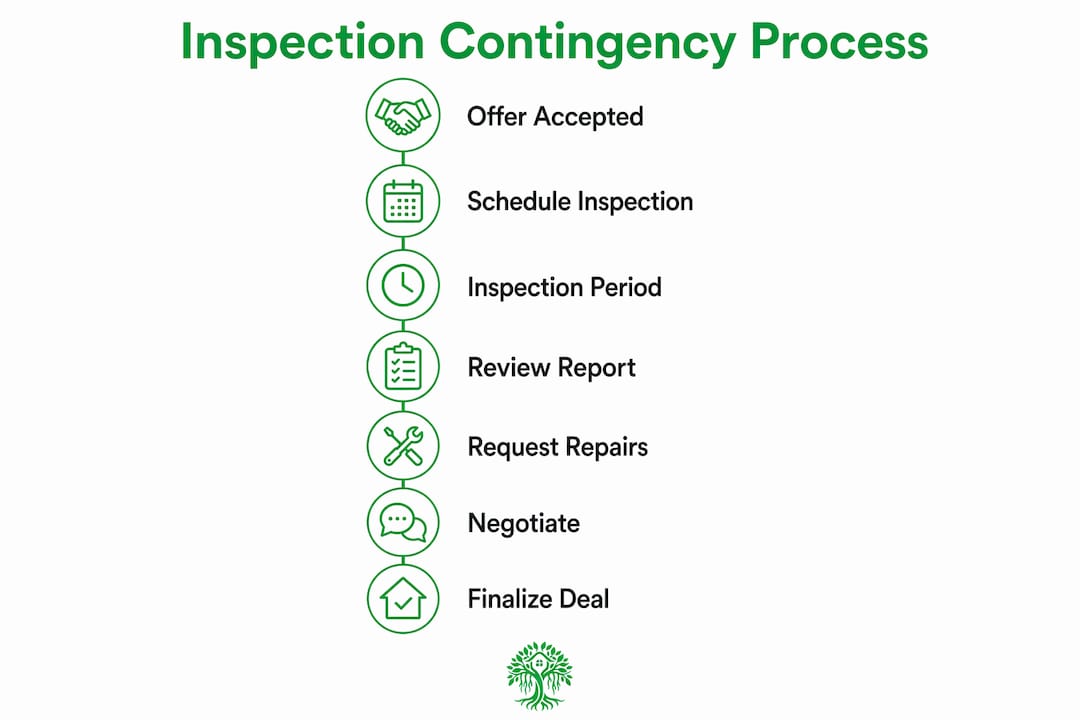
The inspection contingency activates the moment the seller accepts your offer. From that point, the clock runs on your inspection period. Here is the typical sequence:
- Day 1: Offer accepted. Your inspection period begins.
- Days 1–3: Schedule your inspector. In hot markets, inspectors book quickly, so call the same day your offer is accepted.
- Days 2–7: Complete the inspection (usually a 2–4 hour on-site visit).
- Days 3–10: Review the report with your agent. Decide whether to request repairs, ask for a credit, accept the home as-is, or cancel.
- Before the deadline: Submit any repair or credit request to the seller in writing.
- Seller response window (3–7 days): Seller accepts, counters, or refuses your request.
- Final decision: You accept the seller’s response, renegotiate, or cancel within the contingency window and recover your earnest money.
| Stage | Typical Timeframe | Key Action |
|---|---|---|
| Inspection period | 7–14 days from acceptance | Schedule and complete inspection |
| Repair/credit request | Before inspection deadline | Submit written request to seller |
| Seller response window | 3–7 days after request | Seller accepts, counters, or refuses |
| Buyer final decision | Before contingency expires | Accept, renegotiate, or cancel |
Missing your inspection deadline is one of the most costly mistakes a first-time buyer can make. If the period expires without a written cancellation or extension, you may lose your contingency rights entirely and forfeit your earnest money if you later try to walk away. The broader real estate transaction timeline shows how the inspection period fits into the full closing schedule, which typically runs about 43 days from offer to close.

What are your options after the inspection comes back?
Most inspection reports list dozens of items. The vast majority are minor, and that is normal. Your job is to separate the material deficiencies from the routine maintenance notes.
Typical post-inspection outcomes, roughly in order of frequency:
- Accept as-is: Minor issues only; you proceed without requesting anything.
- Request a closing credit: Seller gives you money at closing to handle repairs yourself. This is often the strongest option because you control the contractor and the timeline.
- Request a price reduction: Seller lowers the purchase price. Similar effect to a credit, but it changes the loan amount and may require a new appraisal.
- Request seller repairs: Seller fixes specific items before closing. Riskier, because you cannot control the quality or speed of the work.
- Cancel the contract: Serious defects make the purchase untenable; you cancel within the contingency window and recover your earnest money.
Sellers are not required to agree to any repair or credit request. Their options mirror yours: they can accept, counter, reduce the price, or refuse entirely and let you decide whether to proceed or cancel. Seller response windows commonly run 3–7 days.
For a detailed walkthrough of calculating and presenting credits, the seller credit guide breaks down the math step by step.
Pro Tip: Closing credits beat seller repairs in most situations. When the seller manages the repair, you have no say in who does the work or how well it is done. A credit puts that control in your hands.
Should you waive the inspection contingency?
In competitive markets, some buyers waive the inspection contingency to make their offer more attractive. It works: sellers prefer offers with fewer conditions. But the risk is real. Without a contingency, you have no contractual right to renegotiate or cancel based on inspection findings. A $40,000 foundation problem becomes your problem the moment you close.
Reasons buyers waive:
- To win in a multiple-offer situation where other buyers are waiving
- To signal confidence and speed to a seller who wants a clean close
- To rely on a new-build warranty or recent seller-provided inspection
Risks of waiving:
- No protection if major defects surface after closing
- No leverage to negotiate repairs or credits
- Potential for large, unexpected repair costs with no recourse
Safer alternatives that preserve some protection:
- Informational inspection: You inspect for knowledge, signal no repair requests to the seller, but still learn what you are buying.
- Shortened inspection window: Offer a 5–7 day window instead of 14 to show urgency without fully waiving.
- Repair cap language: Only allow cancellation if repair costs exceed a defined threshold.
- Larger earnest money: Signals commitment and can offset a seller’s concern about contingencies.
Real estate agents consistently report that an informational inspection can keep your offer competitive while still giving you the benefit of a professional evaluation. Combining a shortened window with a larger earnest money deposit often achieves the same competitive effect as a full waiver, with far less risk. For more tactics on competing without sacrificing protections, see how to make a competitive home offer.
Pro Tip: Never waive the inspection contingency on a home built before 1980. Older homes carry a higher probability of lead paint, knob-and-tube wiring, galvanized plumbing, and asbestos insulation. The savings on your offer price will rarely cover those repair costs.
How do you pick a qualified home inspector?
Your inspector’s skill directly determines the value of the inspection. A thorough inspector who explains findings clearly is worth far more than a cheap one who hands you a vague checklist.
Vetting checklist:
- Confirm state licensing (required in most states; check your state’s licensing board)
- Look for membership in ASHI (American Society of Home Inspectors) or InterNACHI (International Association of Certified Home Inspectors)
- Ask for a sample report before hiring to assess detail and clarity
- Request two or three recent client references and actually call them
- Confirm experience with the home’s age, type, and construction style
Questions to ask before you hire:
- How many inspections have you completed on homes of this age and type?
- What does your report include, and how long after the inspection will I receive it?
- Do you carry errors and omissions insurance?
- Will you walk me through findings on-site, or just send the report?
Warning signs to avoid:
- Vague, checkbox-style reports with no photos or explanations
- Refusal to provide references or a sample report
- Any offer to also perform the repairs they find (a direct conflict of interest)
- Pressure to complete the inspection without you present
The home inspector’s role in the buying process covers what to expect from a qualified inspector and how to read the report once it arrives.
What does a home inspection cost, and what are the biggest red flags?
A standard home inspection for a single-family home typically costs between $300 and $500, varying based on the home’s size, age, and location. Larger homes, older construction, or properties with complex systems push costs higher. Specialized tests add to that baseline:
Red flags that commonly lead buyers to cancel or demand major remedies:
- Foundation settlement or cracking: Structural repairs are expensive and can affect insurability.
- Active water intrusion: Moisture in the basement, crawl space, or around windows signals ongoing damage.
- Major roof failure: Missing shingles, failed flashing, or a roof at end of life can mean $10,000–$25,000 in replacement costs.
- Unsafe electrical: Federal Pacific or Zinsco panels, aluminum branch wiring, or ungrounded outlets throughout the home.
- Sewage or septic failure: A failed sewer line or septic system can cost $5,000–$20,000 to repair or replace.
- Large mold contamination: Especially in HVAC systems, attics, or crawl spaces, where remediation is costly and disruptive.
When you identify a major deficiency, get a contractor estimate before submitting your repair request. A documented cost estimate makes your negotiation position far more defensible. Keep in mind that lender concession caps typically limit total seller credits to 3%–6% of the purchase price depending on your loan type, so frame your requests to stay within realistic bounds.
Practical tools: sample clause, buyer checklist, and next-steps workflow
Sample inspection contingency clause (plain language):
What each part does: The inspection window sets your deadline. The cancellation right protects your deposit. The seller-response window creates a defined negotiation timeline. The fallback cancellation right is your exit if negotiations fail.
Buyer checklist for the inspection period:
- Schedule the inspector within 24 hours of offer acceptance
- Gather seller disclosures and any prior inspection reports before the visit
- Attend the inspection in person
- Note all major findings during the walk-through
- Request contractor estimates for any item over $2,000
- Submit repair or credit requests in writing before the deadline
- Confirm the seller’s response deadline in your contract
What to do next, in order:
- Review the report and sort findings into major, mid-range, and cosmetic categories.
- Get repair estimates for major and mid-range items.
- Draft a written repair or credit request, dollar-denominated and supported by estimates.
- Set a clear seller-response deadline in your request.
For a printable version of this checklist, the home inspection checklist for buyers covers every system and document you need to track. Understanding how contract terms are structured also helps you read your specific contingency language with confidence.
Pro Tip: Sort inspection findings into three buckets before you write your request: major systems (HVAC, roof, foundation, electrical, plumbing), mid-range issues (water heater, appliances, drainage), and cosmetic/minor items. Only include the first two buckets in your request. Asking for cosmetic fixes alongside structural repairs dilutes your credibility and gives the seller an easy reason to dismiss the whole request.
A negotiation script and timing guide for first-time buyers
Effective post-inspection negotiation is less about pressure and more about documentation. Sellers respond to specifics, not complaints.
Closing credit request script:
- Open with a brief, neutral summary: “The inspection identified several material deficiencies we would like to address before closing.”
- List each item with a category label (major system, safety item) and a dollar estimate: “Roof replacement: $14,000–$18,000 per two contractor quotes attached.”
- State your request clearly: “We are requesting a closing credit of $15,000 to address these items.”
- Set a response deadline: “Please respond by [date, 5 days from today] so we can proceed within our contingency window.”
For material deficiencies (safety or structural):
Timing checklist:
- Get contractor estimates within 48–72 hours of receiving the report.
- Submit your request at least 3 days before the inspection deadline to leave room for negotiation.
- If the seller refuses, decide immediately whether to accept, counter, or cancel. Do not let the contingency window expire while you deliberate.
Lender concession caps matter here. Seller concessions are commonly capped at 3%–6% of the purchase price depending on your loan type. A $500,000 home with a conventional loan may allow up to $15,000 in seller credits, but pushing beyond that cap can complicate your loan approval. Keep your request within that range, and confirm the exact cap with your lender before you submit. Avoiding common negotiation mistakes at this stage can be the difference between a clean close and a deal that falls apart.
Key Takeaways
A home inspection contingency gives you the right to inspect, negotiate, or cancel within a defined window, and it is one of the few buyer protections in a purchase contract that directly shields your earnest money.
| Point | Details |
|---|---|
| Inspection window | The contingency typically gives you 7–14 days from offer acceptance to inspect and respond. |
| Three negotiation options | You can request a closing credit, a price reduction, or seller repairs. Credits give you the most control. |
| Seller concession caps | Lender rules typically cap seller credits at 3%–6% of the purchase price; confirm your cap before submitting a request. |
| When to consider waiving | In competitive markets, an informational inspection or a shortened window is safer than a full waiver. |
| Ficustree’s role | Ficustree helps first-time buyers in California and Texas manage inspection timelines, vet inspectors, and build defensible credit requests. |
The inspection contingency is not a guarantee, and that gap matters
Most first-time buyers walk into an inspection expecting one of two outcomes: the home passes, or it fails. Neither framing is accurate, and that misunderstanding costs buyers real money.
Every home has defects. A 10-year-old house will have a list of findings. A 40-year-old house will have a longer one. The inspection contingency is not a tool for demanding a perfect home. It is a tool for identifying material deficiencies, pricing them accurately, and negotiating a fair adjustment. Buyers who treat every finding as a crisis lose deals they should have closed. Buyers who ignore major findings because they are afraid to negotiate end up with expensive surprises after closing.
The second misunderstanding is that sellers must fix what the inspector finds. They do not. The contingency gives you the right to ask and the right to walk away if the answer is no. That is meaningful leverage, but it is not a guarantee of repairs. Sellers in strong markets often refuse repair requests entirely, knowing another buyer is waiting. Your job is to know which findings are worth fighting for and which ones you can absorb.
A buyer who used an inspection contingency well once described it this way: the inspector found a failed sewer line and an aging electrical panel. Instead of demanding both be fixed, the buyer requested a single closing credit covering the higher-priority sewer repair. The seller agreed in two days. The buyer closed, hired their own plumber, and had money left over. That outcome happened because the request was specific, documented, and reasonable.
Keep negotiations professional and in writing. A text message is not a repair request. An email with attached contractor quotes and a clear dollar figure is. Document everything, respond within your deadlines, and avoid common negotiation mistakes that signal inexperience to the other side.
How Ficustree helps you navigate inspection contingencies

Managing inspection timelines, vetting inspectors, and crafting a defensible repair request are exactly the kinds of tasks that overwhelm first-time buyers working without support. Ficustree is built for this moment. As a buyer-representation platform for first-time buyers in California and Texas, Ficustree gives you AI-powered decision tools, on-demand showing agents, and direct buyer representation, all for $1,000 at closing plus 1% commission, with a rebate of roughly 2% where legally permitted.
When your inspection report arrives, you do not have to figure out alone which findings are material, what a reasonable credit looks like, or how to frame the request so the seller takes it seriously. Ficustree’s platform and buyer-rep team help you work through that process with clarity and speed.
State and local rules on contingency language, seller concession caps, and earnest money protection vary. Always confirm the specifics with your agent or a local real estate attorney for your situation.
Ready to buy with a team that has your back from offer to keys? Start with Ficustree and see how buyer representation should work.
Useful sources for buyers who want to go deeper
The rules around inspection contingencies, seller concessions, and earnest money protection vary by state and loan type. These sources are reliable starting points, but always confirm specifics with your agent or lender for your market.
- Rocket Mortgage: Inspection Contingency: Clear explanation of how the contingency protects earnest money and typical timelines for inspection and seller response.
- NerdWallet: Waiving a Home Inspection: Covers the trade-offs of waiving, the informational inspection strategy, and how inspection timing fits into the broader closing schedule.
- Chase: Waiving the Home Inspection: Practical overview of when buyers waive and the risk-mitigation alternatives.
- Realtor.com: Should I Waive a Home Inspection?: Agent perspectives on competitive-market strategies and scheduling realities.
- Home Buying Hub: How to Negotiate After a Home Inspection: The most detailed negotiation framework available, covering the three-bucket method, dollar-backed requests, and lender concession caps.
- Texas Real Estate Commission (TREC): Consumer protection notice for Texas buyers, including buyer rights in real estate transactions.
- Ficustree: First-Time Homebuyer Guide: Step-by-step roadmap from search to closing, with California and Texas context throughout.
- Ficustree: Home Closing Checklist: What to track from inspection through final walkthrough and closing day.
State law governs how contingency clauses are written, how earnest money is held, and what disclosures sellers must provide. What applies in California may differ significantly from Texas or any other state. Use these resources as a foundation, then get local guidance from your agent, lender, or a licensed real estate attorney before you sign anything.
FAQ
What is a typical inspection contingency?
A standard inspection contingency gives the buyer 7–14 days from offer acceptance to complete a professional inspection and either accept the home, request repairs or credits, or cancel the contract and recover their earnest money deposit.
What is the biggest red flag in a home inspection?
Foundation problems, active water intrusion, major roof failure, and unsafe electrical panels (such as Federal Pacific or Zinsco) are the findings most likely to lead buyers to cancel or demand significant remedies, because repair costs are high and the issues affect safety and insurability.
How likely is a contingent offer to fall through?
Not every contingent offer falls through. Most inspection negotiations result in a credit, price adjustment, or seller repairs rather than cancellation. Buyers cancel most often when major structural, electrical, or water-intrusion issues surface and the seller refuses to negotiate.
Can you make an offer on a house contingent on inspection?
Yes. Including an inspection contingency in your offer is standard practice in most U.S. markets. The seller can accept, counter, or reject your offer, but the contingency itself is a normal part of residential purchase contracts and does not automatically make your offer less competitive.
Does waiving the inspection contingency mean skipping the inspection entirely?
No. You can still hire an inspector after waiving the contingency, but you give up the contractual right to renegotiate or cancel based on findings. An informational inspection is a common middle ground: you learn the home’s condition without signaling to the seller that you will request repairs or credits.
This article is general information for educational purposes and does not constitute legal, financial, or real estate advice. Inspection contingency rules, earnest money protections, and seller concession caps vary by state, loan type, and contract terms. Confirm the specifics with a licensed real estate agent, lender, or attorney in your market before making any decisions.
Recommended
- Home Inspection Checklist for Buyers: 2026 Guide – ficustree.ai
- Home Inspection Secrets Every Buyer Should Know
- First-Time Homebuyer Mistakes California Buyers Must Avoid – ficustree.ai
- First Time Homebuyer Guide: Simple Steps for Your First Home

Leave a Reply