Category: Market Guides

  • Avoid $100–$500/day Balcony Inspection Fines for CA Buyers & Owners

    Avoid $100–$500/day Balcony Inspection Fines for CA Buyers & Owners

    If you own or manage a California condominium governed by an HOA, SB 326 applies, and its first inspection deadline already passed on January 1, 2025. If you own a rental apartment building instead, SB 721 governs you, with an initial deadline of January 1, 2026. Either way, the next move is the same: hire a qualified inspector now and keep written proof of the engagement.


    TL;DR:

    • HOA-governed condominiums had an inspection deadline of January 1, 2025, requiring licensed engineers or architects to inspect balconies and supported structures every nine years.
    • Rental apartment buildings with three or more units rely on SB 721, with a first inspection deadline of January 1, 2026, requiring at least 15% sampling of exterior elements and reinspection every six years.
    • Inspections mainly consist of visual checks using non-invasive tools, with mandatory further inspection if water intrusion or decay is detected, and reports must be filed within 45 days.
    • Missing repair deadlines under SB 721 can incur civil penalties of $100 to $500 per day, while SB 326 enforcement involves local authorities and remedies without fixed daily fines.
    • Owners and HOA boards should confirm applicable laws, engage licensed inspectors, retain detailed records, and plan repairs promptly to avoid penalties and facilitate smooth resale transactions.

    Ficustree
    Review Inspection Disclosures With Clarity
    Ficustree helps California first-time buyers review building inspection disclosures as they evaluate a home and its potential risks.

    Table of Contents

    SB 326 at a glance: HOA and condominium responsibilities

    SB 326 covers common interest developments, meaning condo buildings with three or more units managed by a homeowners’ association. Under Civil Code §5551, the HOA board must have a licensed structural or civil engineer, or a licensed architect, perform a visual inspection of a random, statistically significant sample of the building’s exterior elevated elements. If the inspector spots water intrusion, a further, more invasive inspection may follow.

    The law also asks boards to line up this inspection cycle with their reserve study planning, since both processes look at the same load-bearing components and repair timelines.

    • The inspection covers balconies, decks, walkways and stairways supported by wood framing.
    • Inspectors must be licensed engineers or architects, not general contractors.
    • Inspections repeat at least once every nine years.
    • Reports must be signed, dated and kept on file by the association.

    SB 721 at a glance: rental apartments and owner obligations

    SB 721 targets multifamily rental buildings with three or more units where exterior elevated elements rely on wood framing for structural support. Health & Safety Code §17973 allows a wider pool of qualified inspectors than SB 326 does: licensed architects, licensed civil or structural engineers, or A, B or C-5 contractors with at least five years of relevant experience, along with inspectors certified by local jurisdictions.

    Reinspection follows every six years after the first cycle.

    • Owners choose from architects, structural or civil engineers, or qualified A/B/C-5 contractors.
    • A minimum of 15% of each element type must be inspected.
    • Reinspection is required every six years.
    • Civil penalties apply once repair deadlines are missed and enforcement is triggered, typically by a complaint or a reported immediate threat.

    Inspection process: visual vs. further inspection and what the report must include

    Most inspections start as visual inspections. Inspectors walk the property looking at railings, ledger boards, waterproofing and connection points, often using moisture meters, borescopes or infrared cameras to check for hidden decay without tearing into the structure.

    1. The inspector performs a visual inspection of the sampled elements using non-invasive tools.
    2. If moisture, rot or corrosion appears, the inspector orders a further inspection, which can involve removing siding or decking to check the framing directly.
    3. The inspector prepares a written report with photos, a narrative of findings, and a clear flag for any element posing an immediate safety threat.
    4. If an immediate threat exists, the inspector must notify local code enforcement within 15 days, and deliver the full report within 45 days of completing the inspection.

    Pro Tip: Ask your inspector upfront how they define “immediate threat” for your building type, so you are not caught off guard by a same-week notification to code enforcement.

    Deadlines, sampling, and recordkeeping at a glance

    Balcony compliance inspection workflow illustration

    Keeping the dates and thresholds straight matters more than memorizing statute numbers. SB 326’s first inspection window closed on January 1, 2025. SB 721’s original 2025 deadline was pushed to January 1, 2026 after AB 2579 extended it by a year.

    SB 721 sets civil penalties of $100 to $500 per day once an owner misses the statutory repair window without acting, a figure drawn directly from HSC §17973.

    • SB 326 requires a statistically significant sample; SB 721 requires at least 15% of each element type.
    • Inspectors must deliver written reports within 45 days of completing the inspection.
    • Immediate threats must reach local enforcement within 15 days.
    • Retain inspection reports for at least two full inspection cycles and include them in resale disclosures.

    Repairs, permits, and penalties after defects are identified

    Once an inspection turns up a real problem, the clock and the paperwork both start moving.

    1. If the defect creates an immediate safety risk, restrict access to the area right away and arrange emergency shoring or repairs before anything else.
    2. For non-emergency repairs, apply for permits within the statutory window and hire a licensed contractor who was not the original inspector, since the same party cannot inspect and repair under the law.
    3. Missing the repair deadline under SB 721 triggers civil penalties of $100 to $500 per day until the work is completed.
    4. Under SB 326, enforcement runs through local code authorities and general civil remedies rather than a fixed daily penalty schedule.
    5. Delayed repairs can also complicate insurance renewals or claims, since insurers increasingly ask for proof of current EEE compliance before renewing coverage on older buildings.

    Practical compliance checklist for owners and HOA boards

    A little organization now saves a lot of stress later, especially if a sale or refinance is on the horizon.

    • Confirm which statute applies to your property and document ownership structure and governance in writing.
    • Engage an independent, licensed inspector and verify their license, insurance, and the lack of conflict of interest with any repair contractor.
    • Keep engagement letters, inspection reports, photos, permit applications, and repair invoices together in one file.
    • Coordinate budgeting with your reserve study, plan for possible special assessments, and collect at least two contractor bids for larger repairs.

    Pro Tip: Start your file now, even before an inspector arrives. A dated engagement letter is often the strongest evidence of good-faith compliance if a complaint ever triggers an inquiry.

    What buyers and their representatives should watch for

    Inspection reports under SB 326 and SB 721 increasingly show up in resale disclosures, and buyers should ask for them early rather than waiting for escrow. A building with a clean, well-documented inspection history tells a very different story than one with vague or missing records, and that difference shapes negotiating leverage and peace of mind. Clear compliance paperwork also makes it easier for a buyer’s representative to flag real risk instead of guessing.

    — Anand

    How Ficustree supports buyers reviewing building inspection disclosures

    Reading through a stack of inspection reports, permit filings, and HOA disclosures is exactly the kind of task that eats up a first-time buyer’s evenings. Ficustree’s decision intelligence tools are built to shorten that process, flagging the parts of a disclosure package that actually affect your offer or your closing timeline instead of leaving you to sort it out alone.

    Ficustree

    • We help you review inspection reports and disclosures quickly, calling out items tied to balcony or structural compliance.
    • Our platform prioritizes findings that affect affordability or escrow risk, so you know what to ask about before you’re under contract.
    • Buyer representation through the Direct Path pairs that review with a one-time service fee at closing plus commission, with a rebate where legally permitted.

    If you are evaluating a condo or apartment building with an EEE inspection history, visit Ficustree to see how buyer representation and document review work together, or start with our guide on reviewing California buyer disclosures before you make an offer.

    Official statutes and county guidance for quick reference

    Sources

    FAQ

    What are the requirements for inspecting balconies under SB 326?

    SB 326 requires HOA-governed condo buildings with three or more units to have a licensed structural or civil engineer, or architect, visually inspect a statistically significant sample of exterior elevated elements at least once every nine years, as set out in Civil Code §5551. If the inspector finds water intrusion, a further, more invasive inspection can follow.

    Can I smoke on my balcony at my apartment?

    Smoking rules on balconies come from local ordinances, lease terms, or HOA bylaws, not from the structural inspection laws covered here. SB 326 and SB 721 deal only with the physical safety of balconies and other exterior elevated elements, so check your lease or association rules separately for smoking policies.

    How much does a balcony inspection cost in California?

    Costs vary by building size, sample requirements, and which type of licensed professional performs the work; no fixed statewide figure is published for either law. Getting quotes from two independent, properly licensed inspectors is the most reliable way to budget for your specific property.

    What are the laws regarding apartment inspections in California?

    Rental apartment buildings with three or more units and wood-framed exterior elevated elements fall under SB 721, codified at HSC §17973, which set an initial inspection deadline of January 1, 2026 after a one-year extension.

  • Before Closing, Texas Buyers: Check Flood Zones and Get a Flood Quote

    Before Closing, Texas Buyers: Check Flood Zones and Get a Flood Quote

    Check FEMA’s Map Service Center and the TWDB State Flood Plan viewer to find your Texas property’s official flood zone, then request an insurance quote and call your local floodplain administrator if anything looks unclear. A property in a Special Flood Hazard Area, labeled A or V, faces meaningfully higher risk and often triggers mandatory flood insurance from your lender. Verifying this before you write an offer saves you from surprises at closing.


    TL;DR:

    • Use FEMA’s Map Service Center for official flood zone determinations, especially when preparing for mortgage or insurance requirements.
    • Elevation certificates and mitigation measures can lower flood insurance premiums, making early documentation valuable before signing a contract.
    • Future flood risk may expand due to ongoing development and climate changes, so long-term planning and regional risk monitoring are essential.
    • First-time buyers should verify their property’s flood zone, obtain a written insurance quote, and consult local floodplain officials before making an offer.

    Ficustree
    Make Flood Risk Part Of Your Decision
    Ficustree helps Texas first-time buyers assess homes with decision intelligence, so important property factors inform the path from search to keys.

    Explore Ficustree

    Table of Contents

    Where to view official Texas flood maps and interactive tools

    Start with FEMA’s Map Service Center at msc.fema.gov, which hosts the National Flood Hazard Layer and the official Flood Insurance Rate Maps that lenders and insurers rely on. This is the source that carries legal weight for mortgage and insurance decisions, so it should be your first stop for any Texas address.

    The Texas Water Development Board runs a separate statewide viewer built for planning rather than regulation. Its State Flood Plan tools and Floodplain Quilt dataset show current and future-condition flood extents across the entire state. This matters if you care about how a property’s risk might change over the next 20 or 30 years.

    County and city floodplain administrators round out the picture, especially when a map is being updated. They often know about pending revisions before FEMA finalizes them.

    • For lender or insurance purposes: use FEMA’s Map Service Center and the National Flood Hazard Layer.
    • For long-term planning: use the TWDB State Flood Plan viewer and Floodplain Quilt.
    • For pending changes or local rules: contact your county or city floodplain administrator directly.

    How FEMA flood zone labels work and what SFHA means

    FEMA sorts flood risk into zone codes, and the two that matter most are A and V. Together they make up the Special Flood Hazard Area, or SFHA, which FEMA defines as land with at least a 1% annual chance of flooding. Zone A covers general high-risk flooding, while V adds coastal wave action, which is why V zones usually carry higher insurance costs.

    Zone AE is a more detailed version of Zone A that includes base flood elevation data, which insurers and builders used to calculate premiums and construction requirements. Zones X, B, and C represent moderate to low risk, and Zone D means the risk hasn’t been studied at all.

    • A and V: high risk, inside the SFHA, insurance often mandatory for federally backed loans.
    • AE: high risk with elevation data attached, common in areas with detailed studies.
    • X, B, C: moderate to low risk, insurance optional but not without value.
    • D: unstudied, risk unknown.

    A property in an SFHA faces roughly a 1-in-4 chance of flooding over the life of a 30-year mortgage, according to FEMA. That single figure explains why lenders treat these zones so seriously, and why buyers should never assume a property outside the SFHA carries zero risk.

    What zones mean for buyers: insurance, mortgage requirements, and mitigation

    If your property sits in an SFHA and your loan is federally backed, your lender will require flood insurance through the National Flood Insurance Program before closing. This isn’t optional or negotiable, and skipping it isn’t an option your lender will allow.

    Timing matters more than most buyers realize. If a property was recently remapped into an SFHA, the Newly Mapped discount lets owners lock in lower premiums, but only if they purchase or renew NFIP coverage within 12 months of the map change. Miss that window and the discount disappears.

    Mitigation steps can meaningfully affect what you pay:

    • Elevation certificates document your home’s height relative to the base flood elevation and often lower premiums.
    • Floodproofing measures, like sealed foundations or elevated utilities, can reduce risk and cost.
    • Structural elevation is the most effective option for older homes in high-risk zones, though it’s also the most expensive.

    Pro Tip: Ask the seller for an elevation certificate before you write your offer. It’s a small ask that can save you thousands in annual premiums.

    Before you sign anything, request seller disclosure of past flooding, get an insurance quote in writing, and consider adding an insurance contingency to your contract so you’re not locked in before you know the real cost.

    Insurance quote linked to home contract contingency

    How to check your flood designation and correct map errors

    Confirming your zone accurately takes a few concrete steps, especially if the property sits near a boundary line.

    1. Confirm whether the FIRM is effective or preliminary using FEMA’s Map Service Center product availability list, which shows LFD and FIRM dates for every Texas county.
    2. Gather documentation including a survey, plat, and elevation certificate, then reach out to your local floodplain administrator or a FEMA Map Specialist for a second opinion.
    3. File an appeal if the map looks wrong. A Letter of Map Amendment (LOMA) or Letter of Map Revision (LOMR) can remove a structure from the SFHA if elevation data supports it, while a Letter of Determination Review (LODR) challenges a preliminary map before it becomes effective.

    Preliminary maps typically carry a public comment period, and acting during that window matters because once a map becomes effective, the appeal process gets more involved. Lenders will follow whatever the effective map says, so a pending appeal doesn’t pause the insurance requirement.

    Texas statewide picture: what the 2024 State Flood Plan shows

    The Texas Water Development Board’s 2024 State Flood Plan estimates that a significant portion of Texas land lies within the 1% annual chance floodplain, and it projects that future conditions will expand that extent further. That’s a substantial share of the state, and it’s not evenly distributed.

    Flash Flood Alley, the corridor running through the Hill Country and Central Texas, sees fast-rising water that outpaces some existing maps. The Gulf Coast faces its own pressure from storm surge and rapid development that changes drainage patterns faster than maps get updated.

    • Expect some maps to shift as the state incorporates future-condition modeling into local studies.
    • Budget for the long term, not just today’s insurance quote, since resale value can be affected by reclassification.
    • Watch regional patterns, since Central Texas and coastal counties face the fastest-changing risk profiles.

    A first-time buyer’s flood zone checklist

    Before you write an offer on a Texas property, run through a short list: check the address on FEMA’s Map Service Center, get a written flood insurance quote, ask for an elevation certificate if one exists, and call the local floodplain administrator if anything about the zone or map status seems unclear. Do this before you’re emotionally attached to a house, not after.

    Some homebuyer platforms integrate flood zone context with affordability and neighborhood data, helping buyers consider flood risk alongside other factors in their purchase decisions rather than as a separate task. That kind of integration is exactly what makes the difference between guessing and knowing before you sign.

    — Anand

    How Ficustree helps Texas buyers assess flood risk

    Buying your first home in Texas means juggling flood maps, insurance quotes, and a dozen other unfamiliar tasks at once. Ficustree brings flood zone context, affordability tools, and direct buyer representation into a single platform, so you’re not piecing together answers from five different websites.

    Ficustree

    The premium platform itself is free to use.

    • Address-level insight that pairs flood zone data with affordability calculations in one place.
    • On-demand showing agents who can walk a flood-prone property with you and flag questions worth asking.
    • Direct representation through The Direct Path, built specifically for first-time buyers who want guidance without the traditional agent markup.

    If you’re actively searching in Texas, start with Ficustree’s buyer page to see how the platform fits into your search.

    Sources

    FAQ

    What is flood zone AE in Texas?

    Zone AE is a high-risk flood zone within the Special Flood Hazard Area that includes detailed base flood elevation data. Lenders typically require flood insurance for homes in this zone if the mortgage is federally backed, and premiums are calculated using the elevation data tied to the zone.

    How is flood zone X different from zone AE?

    Zone X represents moderate to low flood risk and sits outside the Special Flood Hazard Area, while AE is a high-risk zone inside it with mandatory insurance for federally backed loans. Insurance in Zone X is optional, though it’s often still worth carrying given that a notable share of flood claims come from outside mapped high-risk areas.

    How much does flood insurance cost in Texas?

    Flood insurance cost depends on your zone, elevation, and coverage amount, and it’s best confirmed through a direct quote rather than a general estimate. Buyers in a Special Flood Hazard Area should get a quote early, since a Newly Mapped discount is only available within 12 months of a property being newly designated into that zone.

    How do I find my property’s official flood zone in Texas?

    The most reliable way is to search your address on FEMA’s Map Service Center, which shows the effective Flood Insurance Rate Map for your county. For statewide or future-risk context, the Texas Water Development Board’s flood planning viewer adds detail FEMA’s regulatory maps don’t cover.

    Can I appeal an incorrect flood zone designation?

    Yes, property owners can file a Letter of Map Amendment or Letter of Map Revision if elevation data shows the structure sits above the base flood elevation. Your local floodplain administrator or a FEMA Map Specialist can confirm which option applies and what documentation you’ll need.

  • Statute Forward Playbook: California Seller Disclosures and 2026 Rules

    Statute Forward Playbook: California Seller Disclosures and 2026 Rules

    California sellers must deliver a completed Transfer Disclosure Statement and several related forms before title transfers, and skipping or delaying them creates real legal exposure. If disclosures arrive after a buyer has already gone into contract, that buyer gets 3 days to cancel in person or 5 days by mail or electronic delivery. Starting January 1, 2026, sellers also owe buyers new written notices about electrical inspections and gas appliance replacement rules.


    TL;DR:

    • Sellers must deliver the Transfer Disclosure Statement and related forms before title transfer to avoid legal exposure, with a three or five-day cancellation window if disclosures arrive post-contract.
    • The core TDS requires honest descriptions of property systems and defects, supported by permits, contractor reports, and prior inspections to limit liability.
    • Starting January 1, 2026, sellers must include notices about electrical inspections and gas appliance replacement restrictions, especially if the property is in a wildfire risk zone.
    • Exemptions from disclosure obligations exist for court-ordered transfers, trustee sales, co-ownership transfers, and some new-construction sales, but local ordinances may impose additional requirements.
    • Proper documentation and timely delivery of disclosures protect sellers from lawsuits, misrepresentation claims, and facilitate faster, smoother sales negotiations.

    Ficustree
    Make Sense Of California Disclosures
    Ficustree helps first-time buyers use clearer information when evaluating California homes, disclosures, and the decisions ahead.

    Explore Ficustree

    Table of Contents

    Who has to comply with California’s disclosure law

    California’s disclosure requirements live in Article 1.5 of the Civil Code, Sections 1102 through 1102.19. The statute covers transfers of one to four unit residential property, including leases with an option to purchase and ground leases tied to improvements. If you’re selling a typical single-family home, condo, or small multi-unit building in California, you’re inside this framework.

    Not every transfer triggers the full disclosure package. Common exemptions include:

    • Transfers by court order, such as probate, bankruptcy, or eminent domain proceedings.
    • Transfers by a trustee under a deed of trust, including foreclosure sales.
    • Certain transfers between co-owners or to a spouse as part of a divorce settlement.
    • Some new-construction sales where a public report already covers required disclosures.

    Even when a statutory exemption applies, local ordinances sometimes layer on additional disclosure duties, particularly in cities with their own hazard or rent-control notice requirements. It’s worth checking with your municipality before assuming you’re fully in the clear.

    Responsibility for delivering disclosures typically falls on the seller, but a listing agent usually manages the paperwork and timing in practice. When both a listing agent and a buyer’s agent are involved, DRE guidance makes clear that both brokers share a duty to disclose material facts they know or should reasonably know, even if the seller’s form is silent on them.

    Timing matters because it controls the buyer’s legal options. Disclosures delivered before an offer is accepted simply become part of the deal the buyer agreed to. Disclosures delivered after acceptance, however, open a cancellation window, and how you deliver them (hand it over versus mail it) determines whether that window is 3 or 5 days.

    The Transfer Disclosure Statement and the other forms you need

    The Transfer Disclosure Statement, commonly called the TDS, is the core document in a California sale. It asks you to describe the condition of the property’s systems (plumbing, electrical, roof, foundation), note any known defects, and disclose material facts that could affect a buyer’s decision, such as neighborhood nuisances, boundary disputes, or unpermitted work.

    Completing the TDS honestly means resisting the urge to guess. If you don’t know whether the roof was replaced in 2016 or 2019, say so and find the permit rather than picking a year. Vague or optimistic answers create exactly the kind of gap that fuels a lawsuit later.

    Beyond the TDS, most California sales require several companion disclosures:

    1. Natural Hazard Disclosure Statement, covering flood, fire, seismic, and other zone designations tied to the property’s location.
    2. Smoke detector and water heater compliance statement, confirming the home meets state safety standards for both.
    3. Mello-Roos and special tax district notices, when the property sits inside a district that levies additional assessments.
    4. Lead-based paint disclosure, required for homes built before 1978 under federal law.
    5. Local disclosures, which vary by city or county and may cover items like rent control status or specific zoning notices.

    If you obtained title within the last 18 months, Civil Code §1102.6h requires you to disclose any contractor work of $500 or more, including additions or structural changes, and to provide contractor names or permit copies when you have them. Buyers and their agents often ask for this documentation directly, so having it ready speeds things up.

    Attaching a professional report, from a licensed engineer, pest control operator, or contractor, can genuinely help you. The DRE reference handbook notes that when a report from a qualified professional covers a specific item, your liability for that item is generally limited to what the report states, rather than your own lay assessment. If a buyer’s inspector previously flagged foundation cracks or a pest issue, get a written opinion from a specialist and attach it.

    Before you sit down to fill out the TDS, gather:

    • Permit records for any remodeling, additions, or major repairs.
    • Contractor contact information and invoices for work over $500.
    • Prior inspection reports, including pest, roof, or structural evaluations.
    • HOA documents and any special assessment or tax district notices.

    Having these on hand turns the TDS from a guessing exercise into a documentation exercise, which is exactly what protects you if a dispute arises after closing.

    Wildfire and natural hazard disclosures under the new 2026 rules

    The Natural Hazard Disclosure Statement requires you to state whether the property sits in a special flood hazard area, a seismic hazard zone, a landslide zone, or a fire hazard severity zone. When a hazard map is genuinely ambiguous about your parcel, the safer move is marking “yes” or attaching an expert opinion rather than guessing “no.” Our guide to Natural Hazard Disclosure zones breaks down how each zone can shift buyer offers.

    If your home was built before January 1, 2010, and sits in a high or very high fire hazard severity zone, Civil Code §1102.6f requires you to disclose the property’s wildfire vulnerability and provide a list of low-cost retrofits, noting which ones you’ve completed. This retrofit list requirement took effect July 1, 2025, so sellers who listed before that date may not have seen it yet.

    Wildfire retrofit vent on California home

    Starting January 1, 2026, California sellers must also deliver two additional written notices under SB-382: an advisory recommending an electrical system inspection, and a disclosure about any known restrictions on replacing gas-powered appliances. The electrical advisory specifically flags that substandard wiring can create fire risk and insurance complications, and that panel capacity can limit future electrification upgrades.

    To prepare:

    • Pull any documentation of completed retrofits (vent screens, ember-resistant vents, roof upgrades).
    • Reference CAL FIRE’s home hardening resources to match your retrofit list against recognized categories.
    • Keep permits for electrical or gas system work in the same file as your TDS backup documents.

    Our wildfire risk guide covers what buyers look for once they see a fire zone disclosure, which is useful context for pricing conversations.

    The mistakes that turn into lawsuits after closing

    Most post-closing disclosure disputes trace back to a handful of avoidable errors. Sellers rush the TDS, skip sections they assume don’t apply, or answer from memory instead of pulling records. Common patterns include:

    • Leaving TDS sections blank instead of answering “unknown” with an explanation.
    • Failing to mention contractor work because the seller forgot or didn’t think it counted.
    • Marking “no” on a hazard zone question without checking the current map.
    • Relying on what a previous owner told them rather than verifying independently.

    When a buyer later discovers a defect the seller should have known about, the resulting claims usually take the shape of fraud, negligent misrepresentation, or concealment. These claims hinge on what the seller actually knew or reasonably should have known, which is why documentation matters more than good intentions.

    Delivery timing compounds the risk. A disclosure delivered late doesn’t just annoy the buyer, it opens the statutory cancellation window and signals to a court that the seller wasn’t managing the process carefully. That impression can follow into any later litigation over what was or wasn’t disclosed.

    Pro Tip: Keep a dated folder, physical or digital, of every permit, invoice, and inspection report tied to the property, and hand copies to your agent before the TDS is drafted, not after a buyer asks.

    Good recordkeeping does double duty. It makes the TDS faster to complete accurately, and it gives you something concrete to point to if a buyer challenges your disclosures months after closing.

    A step-by-step plan to limit your liability before you list

    Getting disclosures right isn’t complicated, but it takes sequencing. Here’s the order that keeps you protected:

    1. Gather your paper trail first. Permits, contractor invoices over $500, prior inspection reports, HOA documents, and any special tax notices should all be in one place before you open the TDS form.
    2. Complete the TDS, NHDS, and required companion forms together, attaching expert reports (engineer, pest control, contractor) whenever a question touches on something material you can’t verify firsthand.
    3. Deliver everything before your buyer goes into contract when possible. If disclosures must go out after an offer is accepted, track the delivery method carefully since it sets whether the buyer has 3 or 5 days to cancel.
    4. Loop in a real estate attorney or licensed contractor when you’re unsure how to describe a repair, a retrofit, or a past issue. Vague language is riskier than an honest, specific description, even an unflattering one.

    Pro Tip: When describing a completed retrofit or repair on your disclosure, name the work, the date, and who did it. “New roof, 2021, licensed contractor, permit on file” protects you far better than “roof is fine.”

    What buyer representation teaches sellers about disclosure quality

    We built Ficustree to represent first-time buyers directly across California, and one pattern shows up constantly: the quality of a seller’s disclosures shapes how fast a deal closes. Buyers using data-driven representation tend to review the TDS, NHDS, and retrofit disclosures line by line rather than skimming, and incomplete answers trigger follow-up requests that slow escrow down.

    Tidy, well-documented disclosures cut negotiation friction because they answer the buyer’s questions before they’re asked. When permits are attached and contractor work is clearly dated, buyer’s agents spend less time chasing paperwork and more time evaluating price. Sellers who attach expert reports for material issues also see fewer renegotiation attempts after inspection, since the buyer’s side already has the professional opinion in hand. Our buyer-side disclosure review guide shows exactly what buyers are checking for.

    Why full disclosure is usually the smarter business move

    Sellers often worry that disclosing every flaw will scare off buyers or invite lowball offers. In practice, the opposite tends to happen. Thorough, timely disclosure signals a seller who has nothing to hide, and that tends to produce faster, cleaner negotiations with fewer surprises during inspection.

    You can still negotiate hard on price and repair credits. Disclosure obligations and negotiating strategy aren’t in conflict: you disclose what the law requires, then negotiate the terms around it. What you can’t do is use vague or incomplete answers as a negotiating tool, because that’s the exact behavior that turns into a lawsuit. If you’re curious how buyer representation shapes the offers you’ll receive once your disclosures are out, our guide on seller concessions in California walks through that dynamic.

    — Anand

    How Ficustree helps buyers act on clear disclosures

    An AI-powered buyer representation platform serves first-time home buyers struggling with the complexity of disclosures like the TDS. When sellers deliver clean, well-documented disclosures, buyers tend to move through escrow faster because there’s less back and forth over missing paperwork.

    Ficustree

    • Buyers pay a flat fee at closing plus a commission, with rebates where legally permitted.
    • Showing agents can be engaged on demand.
    • A premium platform with various affordability and neighborhood tools is available for buyers.

    If you’re preparing your home for sale and want a sense of what serious, data-driven buyers will expect from your disclosure package, visit Ficustree to see how buyer representation works from the other side of the table.

    Where to verify these rules yourself

    This article is general information, not a substitute for advice from a qualified lawyer. Consult a qualified legal professional about your own circumstances before acting on anything here.

    Sources

    FAQ

    Are seller disclosures required in California?

    Yes. California sellers of most one to four unit residential properties must deliver a completed Transfer Disclosure Statement along with related forms like the Natural Hazard Disclosure Statement before title transfers. Certain transfers, such as court-ordered sales or trustee foreclosures, are exempt.

    Is California a must disclose state?

    California requires sellers to affirmatively disclose known material facts about a property’s condition, rather than simply staying silent and letting the buyer investigate. This affirmative duty is written into Civil Code Article 1.5, which sets out the required forms and delivery timing.

    What disclosures are required for California real estate?

    Sellers must typically provide a Transfer Disclosure Statement, a Natural Hazard Disclosure Statement, smoke detector and water heater compliance confirmation, and lead-based paint disclosures for homes built before 1978. Homes in high fire hazard zones built before 2010 also require a wildfire vulnerability and retrofit disclosure, and starting in 2026, sellers must add electrical inspection and gas appliance notices.

    Is California a non-disclosure state?

    No, California is not a non-disclosure state. It’s one of the more disclosure-heavy states in the country, requiring detailed written statements about property condition, hazards, and known defects before a sale can close.

    What happens if a seller delivers disclosures late in California?

    If material disclosures arrive after a buyer has already accepted an offer, the buyer gets a statutory window to cancel: 3 days if delivered in person, or 5 days if delivered by mail or electronically. Beyond the cancellation risk, late or incomplete disclosures can also expose the seller to claims of fraud or concealment after closing.

  • Close in 30–60 Days: Escrow Timeline for California First Time Buyers

    Close in 30–60 Days: Escrow Timeline for California First Time Buyers

    In California, most residential escrows close within 30 to 60 days, and many close near the 30 day mark. Your exact timeline depends on your financing type, how fast contingencies get removed, whether title issues surface, and how quickly your county records documents. Check your contract dates now and stay in close contact with your lender and escrow officer so nothing catches you off guard.


    TL;DR:

    • Most California escrows close in 30 to 60 days, with faster closings possible for cash deals and longer timelines for FHA or VA loans.
    • Responding promptly to lender requests and obtaining a preliminary title report early helps prevent common delays such as lien issues or missed contingency deadlines.
    • Finalizing the closing date depends on mutual agreement in the contract, not fixed rules, and recording practices can shift the exact timing of fund transfer.
    • Staying organized and maintaining frequent contact with your lender and escrow officer significantly reduces stress and delays during escrow.
    • Using platforms like Ficustree can provide structured checklists, coordinated communication, and guidance to help first-time buyers stay ahead of deadlines.

    Ficustree
    Stay Clear Through Escrow
    Ficustree helps first-time buyers use decision intelligence and on-demand showing agents while moving from home search toward closing.

    Table of Contents

    1. The staged escrow timeline from offer to close

    Once your offer is accepted, escrow opens within a day or two: your deposit goes in, and the escrow holder assigns an escrow number that tracks every document tied to your sale. From there, the process moves in fairly predictable stages, even though every transaction has its own rhythm.

    1. Day 1 to 3: Escrow opens, your deposit is collected, and the DRE explains that the escrow holder begins acting only on signed instructions from both buyer and seller.
    2. Week 1: Sellers deliver required disclosures, and buyers schedule inspections, appraisals, and any specialist evaluations.
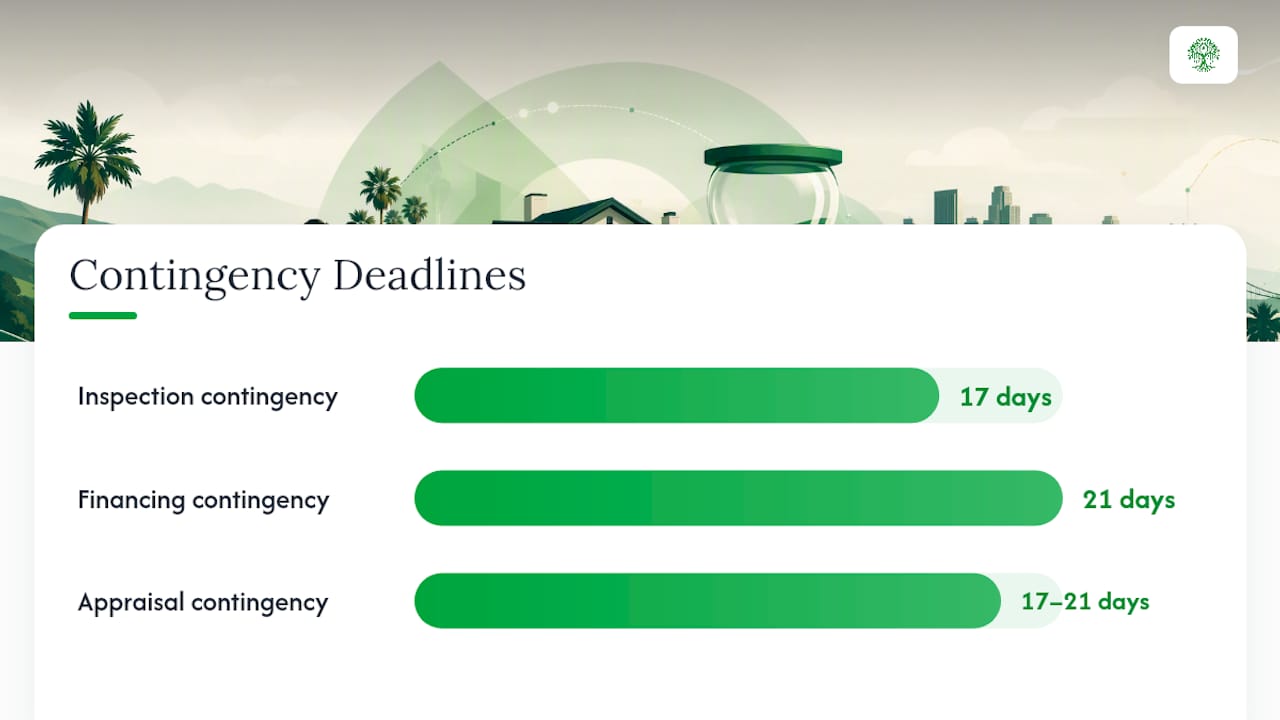
    3. Days 10 to 21: Contingency windows run their course. Under C.A.R. standard purchase agreements, buyers typically get a few weeks to remove general contingencies like inspection and appraisal, with a slightly longer period for the loan contingency, unless both sides agree to different terms.
    4. Days 21 to 35: Your lender finalizes underwriting, orders the appraisal if it hasn’t happened yet, and issues any remaining conditions. This is also when repair negotiations, if any, tend to get resolved.
    5. Final 3 to 7 days: Your Closing Disclosure arrives, you complete a final walk-through, and the transaction funds and records.

    Cash deals can compress this into three weeks or less since there’s no loan contingency to track. Loans with more underwriting steps, like FHA or VA financing, often push closer to the 45 to 60 day range. The DRE notes that the actual length of escrow is set by mutual agreement in your purchase contract and escrow instructions, not by a fixed rule, so your specific closing date lives in your paperwork, not in a general guideline.

    2. What speeds up or slows down your closing date

    Most delays trace back to a handful of repeat offenders, and most of them are preventable if you catch them early.

    • Loan and appraisal delays: Underwriters sometimes ask for additional documents late in the process. Send everything your lender requests within 24 hours, and follow up if you haven’t heard back in a few days.
    • Title problems: Liens, unresolved HOA payoffs, or boundary disputes can stall closing. Ask your title company for a preliminary report early and request payoff letters from any HOA the moment escrow opens. A title search run at the start of escrow, rather than the middle, gives everyone time to fix what it finds.
    • Missed contingency deadlines: If a buyer doesn’t remove a contingency on time, the seller can issue a Notice to Perform, which starts a clock that can lead to contract cancellation. Track your dates on a calendar the day escrow opens.
    • Wire fraud risk: Closing is a favorite target for scammers. The CFPB recommends verifying wiring instructions through a second trusted channel, like a phone call to a known number, before sending any money.

    Pro Tip: Set a recurring reminder to check in with your escrow officer twice a week. Small questions answered early prevent big delays later.

    3. What closing actually means and when funds move

    “Closing” isn’t a single moment. It’s a sequence of legal steps that determine when you get keys and when the seller gets paid.

    Escrow closing shown as sequential legal steps

    Federal law requires your lender to deliver the Closing Disclosure several business days before your scheduled loan closing, under TILA-RESPA rules. That window exists so you have time to compare final terms against your Loan Estimate and catch surprises before you sign. Build that buffer into your calendar; a closing date that ignores it will simply get pushed back.

    Loan funding usually happens the same day as or just before county recording, though timing varies by county. Fee title doesn’t transfer to you until recording is complete.

    If escrow can’t close as scheduled, California Civil Code governs how deposited funds are handled, including good faith disputes.
    CIV 1057.3

    In practice, this means escrow holders can withhold disputed funds or file an interpleader rather than release money to either party unilaterally, which protects both sides if a disagreement drags past your closing date.

    4. A stage-by-stage checklist to keep escrow on track

    Staying organized is the single biggest lever you control once escrow opens.

    1. Right after acceptance: Wire or deliver your deposit, confirm your escrow number, and give your lender’s contact information to your escrow officer.
    2. Mid-escrow: Respond to lender document requests the same day, schedule inspections within the first week, and track every contingency deadline on your calendar.
    3. Final week: Review your Closing Disclosure line by line, confirm your wiring verification protocol with your escrow officer by phone, attend the final walk-through, and have closing funds ready in advance.

    Pro Tip: Request your closing documents three days ahead and compare them against your original Loan Estimate. That comparison catches most last-minute surprises before they become last-minute problems.

    Buyers following a step-by-step escrow guide from the start tend to hit fewer snags, simply because nothing sneaks up on them.

    5. How Ficustree keeps first-time buyers ahead of the timeline

    Ficustree is an AI-powered home buying platform built for first-time buyers in California and Texas. Rather than just listing homes, it works as a decision intelligence layer, walking buyers through disclosures, offer strategy, and escrow milestones with plain-language guidance at each step.

    During escrow specifically, buyers get structured checklists tied to real deadlines, coordinated communication with lenders, and guidance on secure wiring practices to avoid the fraud risks the CFPB warns about. Buyers can also review common first-time buyer mistakes that tend to cause delays, and lean on workflow tools built to keep document collection moving instead of stalling.

    5. How Ficustree keeps first-time buyers ahead of the timeline — overview diagram

    6. What actually matters once your clock starts ticking

    Variability in escrow timing is normal, not a sign something has gone wrong. The buyers who move through escrow with the least stress aren’t the ones who get lucky; they’re the ones who have documents ready before anyone asks for them.

    If there’s one habit worth building, it’s consistent contact with your lender and escrow officer rather than sporadic check-ins. For hands-on support through each stage, Ficustree’s guides walk you through the details in order.

    — Anand

    7. Get guided support through every stage of escrow

    Escrow is where a lot of first-time buyers feel the most uncertainty, mainly because so much happens behind the scenes with lenders, title companies, and escrow officers all moving at once. Ficustree’s Direct Path gives buyers a single point of coordination instead of juggling separate conversations with everyone involved.

    Ficustree

    Here’s what that looks like in practice:

    • Decision intelligence that flags contingency deadlines and lender requests before they become urgent.
    • Coordinated communication so you’re not chasing your lender and escrow officer separately.
    • On-demand showing agents and support, all built around the buyer, with a fixed service fee at closing plus commission and a rebate where legally permitted.

    If you’re actively buying in California and want representation built specifically for first-time buyers, visit the Ficustree buyer page to see how the Direct Path works, or start at Ficustree to explore the platform.

    Sources

    FAQ

    How long does escrow typically take in California?

    Most California escrows close within 30 to 60 days, with many landing near 30 days depending on financing and how quickly contingencies are removed. Cash purchases often close faster, while loans requiring more underwriting steps can push toward the longer end of that range.

    How long does it take to get money after escrow closes in California?

    Sellers typically receive funds once the transaction records with the county, and loan funding usually occurs the same day as or shortly before recording. Recording practices vary by county, so exact timing can shift by a day or two.

    Does escrow have to be 30 days?

    No. The length of escrow is set by mutual agreement in the purchase contract and escrow instructions, not by a fixed legal requirement. Thirty days is a common target, but cash deals can close faster and financed deals sometimes take longer.

    What is the escrow process in California?

    Escrow opens when a signed purchase agreement reaches the escrow holder, who then processes the transaction strictly according to the buyer’s and seller’s signed instructions. From there, the process moves through disclosures, inspections, contingency removals, loan underwriting, and finally funding and recording.

    What causes most escrow delays in California?

    The most common causes are loan underwriting requests, title issues like liens or unresolved HOA payoffs, and missed contingency deadlines. Responding to lender and escrow requests quickly, and ordering a preliminary title report early, prevents most of these delays before they start.

  • First 72 Hours: How Texas Buyers Protect Earnest Money

    First 72 Hours: How Texas Buyers Protect Earnest Money

    Earnest money is not legally required to form a binding contract in Texas, but nearly every offer includes it, and the delivery deadline matters more than the amount. Miss that window and you hand the seller grounds to walk away from the deal, even if your financing is solid.


    TL;DR:

    • In Texas, earnest money is usually between 1% and 3% of the purchase price, with higher amounts common in competitive markets to demonstrate commitment.
    • Deadlines for delivering earnest money are three days after the Effective Date, and funds must be deposited with escrow by the second business day after receipt.
    • Failure to meet delivery deadlines can lead to a breach, but a delay communicated promptly and in writing may prevent losing your deposit.
    • The earnest money is held in escrow and credited toward your down payment or closing costs at closing, protecting both buyer and seller.
    • Combining the option fee and earnest money payments into one deposit requires clear instructions, as their purposes and refund conditions differ significantly.

    Ficustree
    Make Your Texas Offer With Clarity
    Ficustree helps first-time buyers use decision intelligence to move from offer questions toward a clearer path to the keys.

    Explore Ficustree

    Table of Contents

    What earnest money is and how it works in a Texas contract

    Earnest money is a good-faith deposit that tells the seller you are serious about buying. It is not a legal requirement for a contract to exist. Two parties can sign a purchase agreement with zero dollars in earnest money and still have a fully enforceable contract under Texas law. In practice, though, sellers expect it, and an offer with no earnest money attached rarely gets taken seriously in a competitive market.

    The deposit shows up in Paragraph 5 of the TREC One to Four Family Residential Contract, the standard resale form used across the state. That paragraph names the escrow agent, states the amount, and sets the delivery deadline. Once you and the seller sign, the earnest money becomes your performance obligation: you agreed to deliver it, and the contract treats that promise the same way it treats your promise to close.

    The funds do not go to the seller or the listing agent. They go to a neutral third party, usually a title company, though occasionally a broker’s trust account.

    • The escrow agent holds the money until closing, termination, or a signed release from both parties.
    • Escrow agents are not permitted to decide who is right in a dispute; they simply hold funds until instructed by both sides or by a court.
    • At closing, the earnest money is credited toward your down payment or closing costs, so it is not an extra expense on top of your purchase price.

    This structure protects both sides. The seller knows there is a real financial stake behind your offer, and you know a licensed, regulated entity, not the other party’s pocket, is holding your money.

    How much earnest money to offer in Texas

    There is no fixed legal minimum or maximum. The number is negotiated between buyer and seller and written into the contract, and most Texas transactions land in a fairly predictable band.

    A typical earnest money deposit runs 1% to 3% of the purchase price, according to Texas REALTORS® guidance, though some competitive deals push higher. On a $400,000 home, that translates to somewhere between $4,000 and $12,000, a range wide enough that the right number depends heavily on your local market and how badly you want the house.

    Several factors push that percentage up or down:

    • Market competition: in a seller’s market with multiple offers, a larger deposit signals commitment and can tip a close decision your way.
    • Cash versus financed offers: cash buyers often offer more earnest money because there is no lender contingency to worry about.
    • Appraisal and financing risk: buyers with less certain financing sometimes offer smaller deposits to limit exposure if the loan falls through.
    • Seller expectations: some sellers, particularly builders or estate sales, set a required minimum in the listing itself.

    Say you are eyeing that $400,000 home and the market is competitive. Offering $8,000 instead of $4,000 costs you nothing extra at closing since it applies to your down payment either way, but it tells the seller you are financially committed and less likely to walk. The trade-off is that a larger deposit is also a larger sum at risk if you later breach the contract outside a protected contingency, so match the size of your deposit to how confident you are in your financing and your intent to close.

    Deadlines and how to deliver earnest money correctly

    This is the part first-time buyers get wrong most often, and it is the single most time-sensitive step after an accepted offer.

    The standard TREC contract requires buyers to deliver both the option fee and earnest money within three days after the Effective Date, according to the TREC contract form itself. Separately, 22 Tex. Admin. Code § 535.146 requires the broker who receives that money to deposit it with the escrow agent by the close of business on the second working day after the broker receives it, unless the parties agreed to a different deadline in writing.

    Texas earnest money delivery deadline timeline

    If the deadline falls on a Saturday, Sunday, or legal holiday, the deposit window extends to the next business day, per the same TREC rule. That extension matters more than buyers realize: an offer accepted on a Thursday afternoon can shift your true deadline into the following week once weekends and holidays are factored in.

    Here is the sequence to follow the moment your offer is accepted:

    1. Confirm the Effective Date with your agent in writing, since the three-day clock starts there, not on the date you signed.
    2. Get the escrow agent’s exact instructions, including the payee name, wire details, or drop-off address for the title company handling the file.
    3. Choose a trackable payment method, such as a wire transfer or cashier’s check, and avoid personal checks that can bounce or take days to clear.
    4. Deliver funds early, ideally within 24 to 48 hours of acceptance rather than waiting until the deadline.
    5. Request a written receipt from the escrow agent confirming the date and amount received.
    6. Forward that receipt to your agent and keep a copy in case a dispute arises later over timely delivery.

    If you realize funds will be late, tell your agent and the seller’s agent immediately in writing. A short, communicated delay handled in good faith is very different from silence, which sellers can treat as a breach.

    Option fee versus earnest money: two different protections

    Buyers frequently treat these as the same payment. They are not, and confusing them can cost you money you thought was protected.

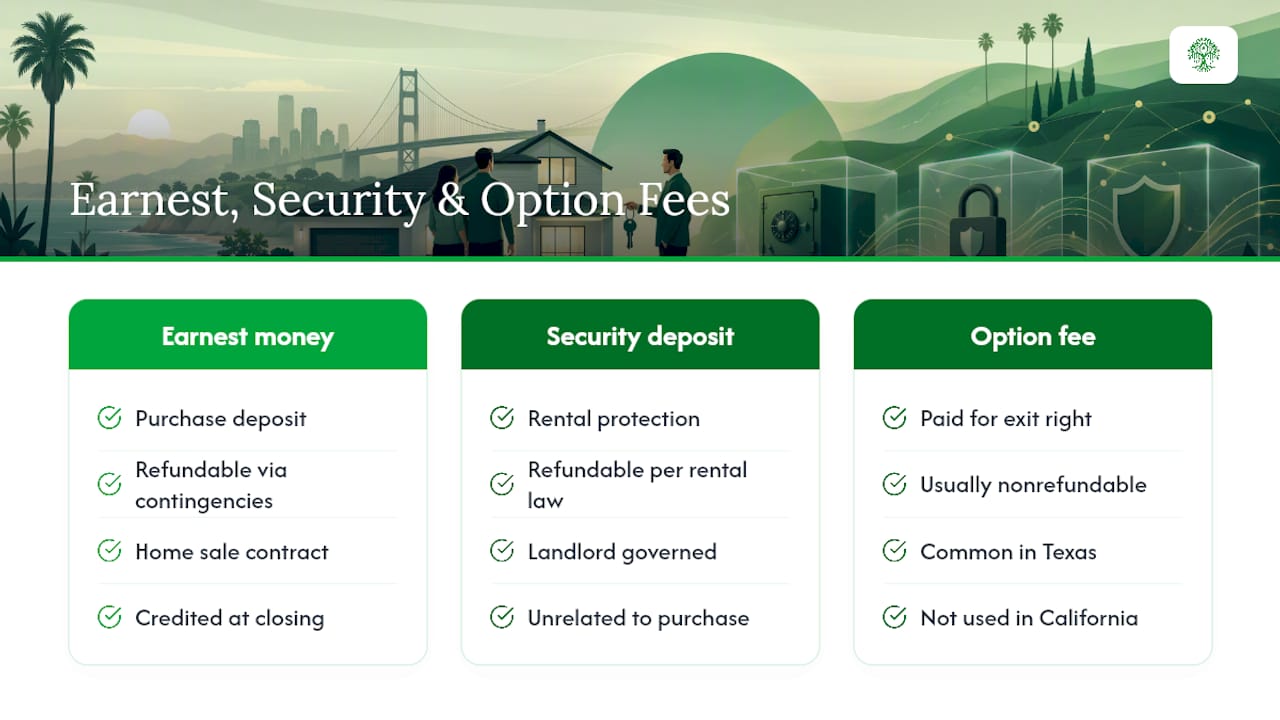
    The option fee buys you the unrestricted right to terminate the contract for any reason during the option period, typically a window of several days to two weeks that you negotiate with the seller. It is paid directly to the seller, not held in escrow, and it is nonrefundable in almost every case. You are paying for the right to walk away, and once you have exercised or waived that right, the seller keeps the fee regardless of what you decide.

    Earnest money is different. It is held in escrow, it is meant to demonstrate commitment, and it is refundable if you terminate under a contingency the contract protects, such as financing or a timely option termination.

    Since a 2021 revision, Texas contracts allow buyers to deliver both payments together to the same escrow agent rather than sending the option fee separately to the seller, according to Texas REALTORS® summaries of the change. When combined, the contract specifies how the money is applied:

    • The escrow agent applies the payment to the option fee first.
    • Any remaining amount is applied to the earnest money.
    • If you terminate during the option period, the seller keeps the option fee portion, and the earnest money portion is returned to you.
    • If you proceed to closing, both amounts credit toward your purchase, just like earnest money alone would.

    Combining the payments simplifies logistics, but it makes the math matter. If you send $500 total intending it to cover a $200 option fee and $300 in earnest money, confirm the escrow agent applied it that way, because a mislabeled deposit can create confusion later if you try to terminate and expect a partial refund.

    When you get earnest money back, and when you lose it

    Most disputes trace back to a handful of predictable situations, and knowing them in advance is the best way to avoid losing your deposit.

    You generally get earnest money back when:

    • You terminate during the option period and the seller has been paid the separate, nonrefundable option fee.
    • Your financing falls through and the contract’s financing contingency protects that termination.
    • An inspection reveals a problem and you terminate within the terms your contract actually allows, not simply because you changed your mind.

    You generally forfeit earnest money when:

    • You refuse to close without a contract-protected reason, which counts as a buyer breach.
    • You fail to deliver the earnest money on time and the seller elects to terminate and claim it as damages.
    • You terminate outside the option period or outside any contingency the contract actually names.

    A low appraisal, on its own, is a common source of confusion. According to TREC guidance, a low appraisal does not automatically give you the right to terminate unless it causes your loan underwriting to fail. Read your financing addendum closely and lean on your lender’s written communication, not the appraisal number by itself, when deciding whether you are protected.

    When buyer and seller disagree about who gets the money, the escrow agent cannot referee. Per TREC’s own FAQ, brokers and escrow agents are not permitted to act as arbiters. If both parties sign a release, funds move quickly. If they do not agree, the money sits until a court resolves it, sometimes through an interpleader action where the escrow holder deposits the funds with the court and steps out of the dispute entirely.

    • Start with a written demand for release addressed to the escrow agent and the other party.
    • Expect any objection window, often around 15 days, before the escrow agent will act on an uncontested release.
    • Consult a real estate attorney early if the seller refuses to sign, since brokers legally cannot force a resolution.

    Pro Tip: Ask your title company in writing what happens if the other side does not sign the release. Knowing the escalation path before you need it saves weeks if a dispute actually happens.

    Steps to protect your earnest money from offer to close

    Protecting your deposit is mostly a documentation problem, not a legal one. Buyers rarely lose earnest money because the law was against them. They lose it because they missed a deadline or could not prove they met one.

    1. Write every deadline into the contract itself, including the option period end date, financing contingency deadline, and any survey or title objection dates, so nothing depends on memory.
    2. Confirm the Effective Date in writing with your agent the same day you sign, since every other deadline counts from that date.
    3. Deliver earnest money and the option fee well before the three-day window closes, not on the last possible day.
    4. Use a trackable payment method such as a wire or cashier’s check, and save the confirmation number or receipt image.
    5. Get a written receipt from the escrow agent and forward it immediately to your agent for the file.
    6. Save every email tied to deadlines, including inspection scheduling, financing updates, and any extension requests.
    7. Coordinate with your lender before you set the financing deadline, so the date in your contract matches what your lender can realistically deliver.
    8. Match your earnest money to your offer’s competitiveness, offering more when you are confident in financing and less when your position is uncertain.

    If your available cash is tight, talk to your agent about structuring a smaller earnest money deposit combined with a stronger pre-approval letter rather than stretching your deposit beyond what you can afford to risk. A strong offer is about more than the deposit size. Clean contingency dates, a solid lender letter, and quick communication often matter as much to a seller as a few extra thousand dollars in escrow.

    Pro Tip: Keep a single email thread with your agent, the title company, and your lender covering every deadline in the transaction. When a dispute happens, that thread becomes your evidence.

    Also confirm early who is representing you and what they owe you under Texas’s buyer representation rules, since your agent’s responsiveness in the first three days often determines whether your earnest money gets delivered on time.

    The first 72 hours after your offer is accepted

    The window right after acceptance is where most earnest money mistakes happen, because buyers are relieved the offer was accepted and lose track of the clock that just started.

    The first 72 hours after your offer is accepted — overview diagram

    An approach to this window starts before the offer is even written. An affordability check against your real numbers, not just a lender’s maximum approval, can help ensure the earnest money amount you offer reflects what you can actually afford to have tied up in escrow. From there, it’s helpful to size a realistic earnest money deposit based on the specific market and competition level for that listing, rather than defaulting to a flat percentage that might be too aggressive or too weak.

    Once an offer is accepted, the priorities are:

    • Confirm the Effective Date and escrow agent the same day, in writing, so the three-day delivery clock is unambiguous.
    • Deliver earnest money and the option fee within the first day or two, well ahead of the contract deadline.
    • Schedule the inspection immediately, since the option period is running concurrently and inspection results often shape your termination decision.
    • Follow up with your lender within 24 hours to confirm the financing timeline matches the contract’s contingency deadline.
    • Save every receipt and confirmation the moment you receive it, rather than assuming you can retrieve it later.

    Explainable AI can help prioritize which contingencies matter most for a given contract and flag realistic earnest money ranges based on comparable local transactions, but it has limits. It cannot replace a signed written release, a lender’s underwriting decision, or a licensed attorney’s advice in an actual dispute. It works best as a way to organize the decisions you need to make quickly, not as a substitute for the paperwork that actually protects your money.

    Urban versus rural earnest money practices in Texas

    Earnest money conventions shift noticeably depending on where in Texas you are buying.

    In fast-moving metro markets like Austin, Dallas, and Houston’s inner suburbs, competition regularly pushes deposits toward the higher end of the typical 1% to 3% range, and in tight bidding situations buyers sometimes offer more to stand out. Option periods also tend to run shorter in these markets since sellers know multiple buyers are ready to step in if one falls through.

    Rural and smaller-market transactions across Texas tend to move slower, with fewer competing offers and more room to negotiate deposit amounts and option period length. Sellers in these markets are often more flexible on earnest money size, and buyers face less pressure to overbid on the deposit just to be competitive.

    The underlying rules, including the TREC delivery deadlines and the escrow structure, stay the same everywhere in the state. What changes is the negotiating pressure around the number, which is exactly why talking with a local agent about current conditions in your specific market matters more than following a statewide average.

    What buyers get wrong about earnest money, and how to avoid it

    Working through Texas contracts repeatedly, the same three mistakes show up again and again, and none of them are about the law being complicated.

    The first is missing the delivery deadline simply because nobody flagged the Effective Date clearly enough. Buyers assume the clock starts on the day they signed, when it actually starts on the date both parties’ signatures make the contract effective, sometimes a day or two later.

    The second is conflating the option fee with earnest money, then being surprised when the option fee is not returned after a termination that was never protected in the first place. The two payments do very different jobs, and treating them as one blurs the actual risk you are taking on.

    The third is failing to document delivery. Buyers wire money, assume it arrived, and have nothing in writing when a seller later disputes whether the deposit was timely.

    Three things fix most of this. Confirm exactly who the escrow recipient is before you send a dollar. Get written proof of delivery the same day funds move. And keep your contingencies, especially the option period and financing deadline, written into the contract in plain language rather than assumed. None of this requires a law degree. It requires treating the first few days after acceptance with the same seriousness you gave the offer itself.

    — Anand

    How Ficustree helps with earnest money and offer decisions

    Ficustree

    Getting the earnest money number right is one small piece of a much bigger decision, and that is where a lot of first-time buyers in Texas end up guessing. Ficustree was built to remove that guesswork from the entire offer process, not just the deposit line.

    The platform gives you a decision intelligence layer for the purchase itself: affordability checks that account for your real budget, offer guidance that reflects current market competition, and on-demand showing agents you can book when you actually want to see a home, not on someone else’s schedule. Because Ficustree represents buyers directly, you get a licensed agent working for you specifically, with the platform’s tools free to use throughout your search.

    On cost, Ficustree is straightforward: buyers pay a $1,000 service fee at closing plus 1% commission, and keep a rebate of roughly 2% where legally permitted, a structure built to put more of your money into the purchase rather than into fees.

    • Run your real affordability numbers before you set an earnest money amount you cannot comfortably risk.
    • Get guidance on sizing your deposit to your specific market instead of guessing at a flat percentage.
    • Book a showing agent on demand when you find a listing worth seeing quickly.

    If you are actively shopping in Texas or California, browse available homes or visit the buyer landing page to see how the process works from search to keys.

    Official rules and guidance worth bookmarking

    These are the primary sources behind the deadlines and definitions covered above, worth keeping handy if a question comes up mid-transaction.

    • 22 Tex. Admin. Code § 535.146 sets the broker’s legal deadline for depositing trust money, including earnest money, with the escrow agent.
    • The TREC One to Four Family Residential Contract is the actual form language governing delivery timing, option fee application, and remedies for late delivery.
    • TREC’s earnest money FAQ explains the limits on broker involvement in disputes and when court action becomes necessary.
    • The Texas REALTORS® legal FAQ on earnest money covers typical amounts and buyer-performance obligations in plain language.

    Sources

    FAQ

    Are there earnest money rules in Texas?

    Yes. Texas does not require earnest money to form a binding contract, but once you agree to pay it, delivery deadlines are enforceable. The standard TREC contract requires delivery within three days of the Effective Date, and brokers must deposit received funds with escrow by the close of business on the second working day after receipt under state regulation.

    How much is earnest money on a $400,000 house?

    Using the typical 1% to 3% range cited by Texas REALTORS®, earnest money on a $400,000 home would fall between $4,000 and $12,000. The exact amount is negotiated with the seller and depends on market competition and financing strength.

    Do you get earnest money back in Texas?

    You get earnest money back when you terminate under a contract-protected contingency, such as a timely option period termination or a covered financing failure. You typically forfeit it if you breach the contract without a protected reason or fail to deliver it on time, according to TREC guidance.

    How much is earnest money typically in Texas?

    Earnest money in Texas typically runs 1% to 3% of the purchase price, though competitive markets or individual negotiations can push the amount higher. The figure is set in Paragraph 5 of the purchase contract and applies toward your down payment at closing.

  • Avoid Surprise Fees: 3 Month Rule for California Buyer Representation Agreements

    Avoid Surprise Fees: 3 Month Rule for California Buyer Representation Agreements

    Yes, California requires a written buyer-broker representation agreement before an agent can legally represent you as a homebuyer. Under Civil Code Title 4.1, Section 1670.50, that agreement must spell out compensation, the services the agent will provide, when payment is due, and an expiration date no longer than three months out. The California Department of Real Estate also advises agents to get that signature squared away before they start touring homes with you, not after.


    TL;DR:

    • Buyers must sign a written agreement before any home tours, with the contract focused on clear compensation, services, payment timing, and a maximum three-month term.
    • The agreement must be signed “as soon as practicable,” ideally before showings, or risk being unenforceable if signed later without a strong reason.
    • Compensation must be explicitly stated as a fixed amount or percentage, and the agreement should include a termination clause allowing easy exit without penalties.
    • Non-exclusive agreements allow multiple agents but require specific actions like showing or submitting offers for agent payment; exclusive agreements limit representation but can secure full attention.
    • The total agreement term cannot exceed three months, and any renewal must be in writing with a new signature, avoiding automatic extensions to stay compliant.

    Ficustree
    Make Your Homebuying Decisions Clearer
    Ficustree helps first-time buyers in California understand their options with AI-powered decision intelligence and direct buyer representation.

    Explore Ficustree

    Table of Contents

    What AB 2992 and California Law Actually Require

    AB 2992 rewrote the rules for buyer representation in California by adding Title 4.1 to the Civil Code, effective January 1, 2025. The law responded to the national commission lawsuits that reshaped how buyer agents get paid, and it gives California buyers a specific, enforceable checklist that any buyer representation agreement in California must satisfy.

    The statute names four elements a compliant agreement must include:

    • Compensation. The agreement has to state, in dollars or as a percentage, how much the agent will be paid.
    • Services to be rendered. It has to describe what the agent actually agrees to do for you.
    • Timing of payment. It has to say when that compensation becomes due, typically at closing.
    • Expiration date. The term cannot run longer than three months from signing.

    A Brownstein Hyatt Farber Schreck legal analysis of the law notes that these requirements exist specifically to prevent open-ended, vague agreements that left buyers unsure what they owed or to whom. Miss any one of those four elements, and the agreement risks being unenforceable, meaning the broker may have no legal claim to compensation from you at all, even after months of work.

    That last point matters more than most buyers realize. An agent who shows you a dozen houses under a defective agreement cannot simply invoice you later and expect a court to enforce it. The statute puts the compliance burden on the brokerage, not on you, but you still want to know what you signed protects you rather than exposes you.

    When Do You Actually Have to Sign?

    California law says a buyer-broker agreement must be signed “as soon as practicable,” and no later than when you submit an offer through that agent. That is the statutory floor. In practice, almost nobody in the California market treats it as the ceiling anymore.

    The DRE’s licensee advisory creates what amounts to a rebuttable presumption that signing before you tour a property is practicable in most situations. Translation: if an agent skips the signature and takes you through an open house first, they need a genuinely good reason, because the regulator’s default assumption is that there wasn’t one.

    Add to that the ripple effects from the national commission settlement. C.A.R. guidance following the MLS rule changes pushes agents toward signed agreements before showings as standard risk management, not just legal minimum compliance. Most brokerages in the state now ask for a signature at the first serious touring appointment, sometimes even before that.

    Here’s how to handle it when an agent hands you paperwork minutes before a showing:

    • Ask for a copy to read fully before signing, even if that means the showing gets pushed back.
    • Confirm the compensation figure is a specific dollar amount or percentage, not a placeholder.
    • Check the expiration date is filled in and does not exceed three months.
    • Walk away from any agent who pressures you to sign without letting you read it first.

    A reasonable agent will not blink at a short delay so you can actually read the contract. One who does blink just told you something about how they operate.

    Decoding the Fine Print: Compensation, Services, and Exit Terms

    The compensation clause is the part buyers skim fastest and regret skimming later. Under NAR’s written buyer agreement guidance, the number you agree to becomes the absolute ceiling on what your agent can collect, from any source. That money either goes back into the deal or gets addressed separately in writing.

    The “services to be rendered” section should read like an actual job description, not boilerplate. Look for specific commitments such as:

    1. Scheduling and accompanying you on property showings.
    2. Preparing and submitting purchase offers on your behalf.
    3. Negotiating price, terms, and repair requests.
    4. Reviewing seller disclosures and flagging issues before you’re under contract.
    5. Coordinating with escrow, lenders, and inspectors through closing.

    Payment timing typically ties to close of escrow, but the agreement should state that plainly rather than leaving it implied. If the seller declines to offer any concession toward your agent’s fee, you are still bound to pay the agreed amount yourself under most standard forms, so know that risk going in.

    Pro Tip: Ask specifically for a termination clause that lets you exit without penalty if you’re unhappy with responsiveness or service quality, and get any carryover language (which can obligate you to pay if you later buy a home the agent introduced you to, even after the agreement ends) explained in plain terms before you sign.

    Exclusive vs. Non-Exclusive: Which One Fits You?

    Buyer representation agreements come in two basic flavors, and the difference determines how tied you are to one agent.

    An exclusive agreement means only that broker can represent you during the term, full stop. A non-exclusive agreement, commonly issued on C.A.R.’s revocable BR-11 form, lets you work with multiple agents simultaneously and revoke the relationship more easily. C.A.R.’s buyer representation guidance confirms that BR-11 defaults to non-exclusive and revocable, while forms like AAP-11 shift you into exclusive, irrevocable territory that requires your specific initials to activate.

    Whether a broker actually gets paid on a given transaction hinges on “broker involvement,” typically triggered by one of five specific actions:

    • Showing you the property in person.
    • Conducting a virtual tour of the property with you.
    • Submitting a signed offer to purchase on your behalf.
    • Providing a market analysis or reviewing property disclosures with you.
    • Introducing you to the property that you ultimately purchase.

    If a buyer’s agent doesn’t do any of those five things, they generally have no compensation claim on that particular property. That distinction is exactly why the exclusive versus non-exclusive choice matters. Non-exclusive language protects buyers who want to interview multiple agents or who found a specific listing on their own before ever meeting a broker. Exclusive agreements make more sense once you’ve found an agent you trust and want full attention devoted to your search, since a related guide on exclusive buyer agency walks through when that tradeoff actually pays off.

    Who Actually Pays Your Agent, and What You Can Negotiate

    Your signed agreement sets a ceiling, not a fixed bill. Commission rates in California are negotiable by law and by long practice, and the percentage or dollar figure you agree to with your agent is the maximum they can collect from any combination of sources, including you and the seller together.

    Sellers can still offer to cover the buyer’s agent fee as part of the deal. That’s a seller concession, and it remains entirely legal after the settlement-driven MLS changes; it just can no longer be advertised on the MLS itself the way it once was. If the seller agrees to pay some or all of your agent’s compensation, that reduces or eliminates what comes out of your pocket at closing. If the seller refuses, you’re contractually on the hook for whatever your agreement specifies, separate from your down payment and closing costs.

    A few practical negotiation points worth building into your offer:

    • Ask your agent to include specific language in the purchase offer requesting the seller pay some or all of buyer-broker compensation.
    • If the seller’s listing already offers a concession, confirm in writing whether it fully covers your agreed fee or leaves a gap.
    • Understand that a below-market listing price sometimes reflects a seller unwilling to offer any buyer-agent concession at all.

    C.A.R.’s guidance on buyer representation agreements notes this cap-and-negotiate structure exists specifically so buyers know their maximum exposure before they ever write an offer. That’s worth internalizing: the number on your representation agreement is the worst case, not a guess. For a deeper walk-through of requesting concessions in an actual offer, see this guide on asking for seller concessions in California.

    Three Months and Done: Why Your Agreement Can’t Run Longer

    California caps buyer-broker representation agreements at three months, full stop, with no automatic renewal allowed. If your agent wants to keep working with you past that window, the renewal has to happen in writing, dated and signed again, matching the same three-month ceiling. Title 10 of the California Code of Regulations makes automatic renewal clauses explicitly prohibited, and corporate entities acting as buyers face slightly different treatment under the same regulations.

    If someone hands you an agreement with a six-month or one-year term, or language suggesting it renews unless you cancel it, that’s a compliance problem, not a minor detail.

    • Confirm the expiration date field is filled in and does not exceed three months from the signing date.
    • Reject any clause implying the agreement continues automatically without a new signature.
    • If you want to keep working with the same agent after expiration, expect (and request) a fresh, dated renewal document.
    • If you’re shown a noncompliant term, you can reasonably ask for a corrected version before signing anything.

    An agreement that violates these limits doesn’t just look sloppy. It risks being void, which means the protections you thought you had, and the obligations the agent thought they had, may not hold up at all.

    Your Pre-Signature Checklist

    Before you sign anything, run through these questions with the agent sitting across from you:

    1. What is the exact compensation figure, in dollars or percentage, and is it filled in rather than left blank?
    2. What specific services does this agreement commit you to provide, showings, offer writing, negotiation, disclosure review?
    3. Is this exclusive or non-exclusive, and did I understand which box got checked?
    4. What is the expiration date, and does it fall within three months?
    5. What are my exit rights if I want to end the relationship early?
    6. Does this agreement address dual agency, where the same agent or brokerage might represent both me and the seller?

    Watch for these red flags, and don’t sign past them:

    • Compensation left as “TBD” or tied to whatever the seller happens to offer.
    • Any renewal language that isn’t a fresh, dated signature.
    • Verbal promises about changes that aren’t reflected in the actual document.
    • Pressure to sign in the driveway before you’ve had a chance to read the disclosures tied to it.

    Pro Tip: If anything in the agreement looks unusual, ask for a day or two to review it, or run it past an attorney. A legitimate agent won’t lose a client over a reasonable request for time; one who insists on an immediate signature is telling you something about how they’ll handle the rest of the transaction.

    Common Forms You’ll See: BRBC, BR-11, NAP-11, AAP-11

    Most California buyer agreements come from C.A.R.’s standard library, and the acronyms are worth knowing before one lands in front of you. The BRBC (Buyer Representation and Broker Compensation Agreement) is the current standard form built to satisfy AB 2992’s requirements directly. BR-11 is the older non-exclusive, revocable form, still in circulation for buyers who want flexibility. NAP-11 and AAP-11 cover non-exclusive and exclusive authorization to purchase, respectively, with AAP-11 requiring your initials to lock in exclusivity and irrevocability.

    Comparison of California buyer agreement forms

    You may also encounter DM-BR or MT-BR modification addenda, which brokerages use to amend an existing agreement’s terms, most often compensation, without drafting an entirely new contract. C.A.R.’s buyer representation resource page is the authoritative place to see current versions of these forms. When a clause looks unfamiliar or unusually worded, that’s the moment to loop in a real estate attorney rather than guess.

    How Ficustree Builds AB 2992 Compliance Into Buyer Representation

    Ficustree operates as an AI-powered buyer representation platform built specifically for first-time buyers in California and Texas, and every agreement template it uses is designed around the exact compensation, services, and expiration language AB 2992 requires. That’s not a footnote for Ficustree; it’s the baseline the entire representation model is built on.

    That figure is written into the agreement the same way the statute requires, as an objectively ascertainable amount, not a vague promise to “match market rate.”

    Short terms, on-demand showing agents, and clear exit language aren’t add-ons here. They’re the same protections AB 2992 requires, just built into a platform designed for someone doing this for the first time. If you want to see how the fee model interacts with seller concessions in practice, the guide on flat-fee buyer agents with rebates walks through the mechanics in more depth.

    Why Most Buyer Agreement Advice Undersells the Real Risk

    Most explainers on this topic treat AB 2992 like a compliance checkbox: sign here, initial there, done. That framing misses what actually protects you. The compensation cap and the three-month term limit aren’t bureaucratic details, they’re the two clauses most likely to cost you money or lock you into a bad relationship if you don’t read them carefully.

    The conventional advice to “just ask questions before signing” is fine but incomplete. The better move is treating every buyer-broker agreement like a short-term contract you can walk away from every ninety days, because that’s exactly what the law now guarantees you. Buyers who understand that leverage negotiate harder on compensation and worry less about being stuck with an agent who isn’t delivering.

    If you take one thing from this article, prioritize the expiration date and the compensation figure over everything else in the document. Those two fields determine your actual exposure. Everything else is important, but those are the numbers that follow you to the closing table.

    — Anand

    Want a Buyer Agreement That’s Actually Built for You?

    Ficustree is the alternative to a traditional agent relationship for buyer representation in California: instead of an open-ended commission and a vague scope of work, you get a flat $1,000 fee at closing plus 1% commission, with a rebate of roughly 2% kept in your pocket where California law allows it.

    Ficustree

    Every agreement Ficustree uses is built around the same compensation, services, timing, and expiration language AB 2992 requires, so you’re not choosing between compliance and simplicity. You get both. Pair that with on-demand showing agents you can book without waiting on one person’s calendar, and a platform that maps out your entire purchase timeline instead of leaving you guessing between disclosures, inspections, and closing. If you’re ready to see what a fixed-fee, AB 2992-aligned representation agreement actually looks like, start with Ficustree’s Direct Path and see your options before you sign anything with anyone else.

    Where These Rules Come From

    Every requirement in this article traces back to a primary source, not secondhand summary. The core statute lives in Civil Code Title 4.1, with legislative history available through the AB-2992 bill record. The DRE’s licensee advisory explains how the regulator expects agents to apply the law in practice, and C.A.R.’s buyer representation resources cover the standard forms in circulation statewide. NAR’s written buyer agreement guidance rounds out the national context behind the compensation cap rule.

    This article is general information, not a substitute for advice from a qualified lawyer. Consult a qualified legal professional about your own circumstances before acting on anything here.

    Sources

    FAQ

    What Are the Requirements for a Buyer-Agent Agreement in California?

    A compliant agreement must state compensation, describe the services the agent will provide, specify when payment is due, and include an expiration date no longer than three months, per Civil Code Section 1670.50. Any renewal has to happen in writing with a new signature rather than automatically.

    Can You Provide an Example of a Buyer Representation Agreement?

    C.A.R.’s BRBC form is the current standard example built specifically to satisfy AB 2992, alongside older forms like BR-11 (non-exclusive) and AAP-11 (exclusive). Ficustree uses its own AB 2992-aligned agreement template as part of its Direct Path representation model.

    Is a BRBC Required in California?

    California law requires some form of written buyer-broker representation agreement covering the statutory elements, though it doesn’t mandate the specific BRBC form by name. Most brokerages use BRBC or an equivalent C.A.R. form because it’s built to satisfy AB 2992 directly.

    Who Pays the Buyer’s Agent Fee in California?

    The buyer is contractually responsible for the compensation figure stated in their signed agreement, though sellers can still offer concessions to cover that cost. If the seller declines to contribute, the buyer owes the agreed amount directly, separate from other closing costs, and the signed figure functions as the maximum the agent can collect from any combination of sources.

  • Test Mortgage Points With Two Loan Estimates and Break Even Math

    Test Mortgage Points With Two Loan Estimates and Break Even Math

    Mortgage points are worth it if you plan to keep the loan long enough to recoup the upfront cost, and only if paying them doesn’t drain the cash you need for closing or emergencies. The two numbers that decide this: how many years you expect to stay in the home, and how much cash you have left after closing. Before you commit, ask lenders for two Loan Estimates, one with points and one without, and run the break-even math yourself.


    TL;DR:

    • Paying points makes sense only if you plan to stay in the home long enough for the break-even period, which averages around five years for typical loans.
    • The actual rate reduction per point varies by lender, so requesting two Loan Estimates from the same lender with and without points on the same day ensures accurate comparison.
    • You should run your own calculations, including taxes and insurance, to determine if the upfront cost will be recouped within your expected ownership timeline.
    • If refinancing soon or expecting to sell, lender credits or no-point options may be more beneficial than paying for lower rates upfront.
    • Keep sufficient reserves after paying points, and consider seller contributions to closing costs, to avoid depleting emergency funds when making your decision.

    Ficustree
    Make Your Homebuying Decision Clearer
    Ficustree helps first-time buyers in California and Texas evaluate affordability and make informed decisions from search to closing.

    Explore Ficustree

    Table of Contents

    What Are Mortgage Points, and How Do They Work?

    A mortgage point, sometimes called a discount point, costs 1% of your loan amount. For example, one point on a $400,000 loan would cost $4,000. You pay it upfront at closing in exchange for a lower interest rate over the life of the loan. Points are prepaid interest, not equity. You’re not building ownership faster. You’re buying a lower monthly payment.

    Pricing varies by lender, loan type, credit profile, and market conditions on any given day. That’s exactly why the CFPB recommends comparing two Loan Estimates side by side, since the rate reduction one lender offers per point can differ noticeably from another’s.

    Points show up in a specific spot on your paperwork, so you can verify what you’re actually being offered:

    • Section A of your Loan Estimate lists origination charges, including points, as a dollar figure and a percentage.
    • The Closing Disclosure repeats this figure so you can confirm nothing changed between application and closing.
    • You can typically buy fractional points, like 0.5 or 1.5, not just whole numbers.
    • Some lenders cap how many points you can buy on a single loan.

    How to Evaluate Paying Points: Break-Even Math and a Decision Checklist

    The math behind mortgage discount points explained in plain terms comes down to one question: how many months until the upfront cost pays for itself? The formula is simple:

    Break-even period = Cost of points ÷ Monthly payment savings

    Here’s how that plays out with real numbers.

    Example 1: You’re financing $300,000 on a 30-year fixed loan at 7%. One point costs $3,000 and drops your rate to 6.75%. Your monthly payment falls from about $1,996 to $1,946, a $50 savings. Break-even: $3,000 ÷ $50 = 60 months, or five years.

    Break-even calculation for mortgage points

    Example 2: You’re financing a larger loan amount with a down payment already in place. Paying points lowers your rate and monthly payment, but the break-even period depends on your specific costs and savings.

    Notice something important: doubling the points didn’t cut the break-even time in half. That’s because rate reductions per point aren’t always linear, and larger loan balances change the dollar impact of each 0.25% shift. Run your own numbers with the Ficustree mortgage calculator, which factors in taxes and insurance so you’re not just looking at principal and interest in isolation.

    A useful sequence for testing whether points make sense for you:

    1. Get two Loan Estimates from each lender, one with points and one without.
    2. Calculate the break-even month using the formula above.
    3. Compare that number against how long you realistically expect to own the home.
    4. Check whether paying points leaves you with less than three to six months of reserves.
    5. Ask if the seller will contribute to closing costs instead of you paying out of pocket.

    Freddie Mac’s own research found that the average rate advantage for borrowers who paid discount points has been small, even as more borrowers chose to pay them. That’s a meaningful caution: points are not a guaranteed win, and the only way to know your actual number is to force the comparison lender by lender.

    Pro Tip: Always request two Loan Estimates from the same lender, one modeled with points and one without, on the same day. Rate sheets shift daily, and comparing quotes pulled a week apart will throw off your break-even math.

    Are Mortgage Points Tax Deductible?

    The IRS treats mortgage points as prepaid interest, which means the tax treatment isn’t as simple as “deduct it all this year.” Generally, you deduct points ratably over the life of the loan unless you meet a specific set of tests that allow a full deduction in the year you paid them.

    To qualify for the immediate deduction, you typically need to meet several conditions:

    • The loan is secured by your main home.
    • Charging points is an established practice in your area.
    • The points don’t exceed the amount generally charged in that area.
    • You paid the points directly, using funds you provided at or before closing, not funds borrowed from the lender.
    • The points appear clearly on your settlement statement, calculated as a percentage of the loan.

    If you refinance instead of purchasing, the rules shift again: points on a refinance usually must be deducted ratably over the new loan term, not all at once. Sell the home or pay off the loan early, and you may be able to deduct any remaining unamortized points in that final year. Because these tests are specific and the consequences of getting them wrong show up on your tax return, talk to a tax advisor before assuming a deduction will offset your upfront cost.

    Lender Credits, Bigger Down Payments, or Points: Which Wins?

    Lender credits work as the mirror image of points. Instead of paying upfront for a lower rate, you accept a slightly higher rate in exchange for cash toward your closing costs. The CFPB frames this as a direct tradeoff: compare a loan with points, a loan with credits, and a loan with neither, across the number of years you actually expect to hold it.

    Credits tend to make more sense when you expect to move or refinance within a few years, or when your cash reserves are thin and you’d rather preserve liquidity than chase long-term interest savings. Points make more sense when you plan to stay put for a decade or more and have surplus cash sitting beyond your emergency fund.

    Refinancing plans complicate the decision either way. If you think rates might drop and you’ll refinance within two or three years, paying points now rarely pays off. You’d be resetting the clock on a new break-even calculation before the first one finished.

    A few questions worth asking before you decide:

    • Will the seller contribute toward closing costs instead of you paying points?
    • What does the lender’s credit option look like at the same loan amount?
    • How does my reserve fund look after paying points versus taking a credit?

    The Ficustree Take: Testing the Points Decision Before You Commit

    Here’s what buyers consistently underestimate: the points decision isn’t really about the interest rate. It’s about liquidity. You can find the perfect break-even number on paper and still make a bad decision if paying points leaves you without a cushion for the roof repair that shows up in month four.

    The Ficustree Take: Testing the Points Decision Before You Commit — overview diagram

    That’s why we push buyers to run two exercises, not one. First, get two Loan Estimates from every lender you’re considering, side by side, on the same day. Second, model the break-even period using a calculator that includes property taxes and insurance, not just principal and interest, because those carrying costs change what “affordable” actually means month to month.

    Buyer representation matters here too. A skilled advocate can negotiate lender pricing directly or push sellers to cover part of your closing costs instead of you paying points out of pocket. That’s often a better use of leverage than assuming the sticker price on points is fixed.

    — Anand

    How Ficustree Helps You Decide

    Ficustree is the alternative to guessing your way through lender paperwork alone.

    Ficustree

    The Ficustree AI mortgage calculator models your break-even period with taxes and insurance built in, so you’re not making a five-figure decision off a napkin estimate. And because Ficustree represents you, not the seller or the lender, you have someone in your corner when it’s time to push back on points pricing or ask a seller to cover part of your closing costs instead. If you’re weighing whether to pay for a lower rate or keep your cash, start with Ficustree and get the numbers run for your actual situation before you sign anything.

    This article is general information, not a substitute for advice from a qualified financial advisor. Consult a qualified financial professional about your own circumstances before acting on anything here.

    Sources

    FAQ

    How Much Do Two Points Reduce a Mortgage Rate?

    The only reliable way to know your exact reduction is to request a Loan Estimate showing the rate with and without points from your specific lender.

    Is Paying One Point Worth It When Refinancing?

    One point is worth it on a refinance only if you plan to keep the new loan long enough to clear the break-even period, which is often four to six years depending on your loan size and rate savings. If you expect to sell or refinance again soon, a lender credit or no-point option usually makes more sense.

    Can I Deduct Mortgage Points on My Taxes?

    Yes, but the timing depends on whether you meet the IRS tests for a full-year deduction, including that the loan is secured by your main home and you paid the points with your own funds at closing. If you don’t meet those tests, you generally deduct the points ratably over the life of the loan instead of all at once.

    How Much Does One Point Affect a Mortgage Payment?

    One point on a $300,000 loan costs about $3,000 and might lower your monthly payment by roughly $50, depending on your rate and loan term. That translates to a break-even period of around five years before the upfront cost pays for itself in monthly savings.

  • Avoid $10,000 Closing Surprises: Transfer Taxes for California Buyers

    Avoid $10,000 Closing Surprises: Transfer Taxes for California Buyers

    California’s documentary transfer tax runs $0.55 per $500 of property value, commonly written as $1.10 per $1,000, and it applies to nearly every recorded real estate sale in the state. That’s just the county floor. Cities like San Francisco and Los Angeles layer on their own tax, sometimes tripling or quadrupling what a seller actually owes at closing.


    TL;DR:

    • California’s base transfer tax is $0.55 per $500 of sale consideration, but city and charter city taxes can significantly increase the total, especially on high-value properties.
    • Transfer taxes are calculated by dividing the sale price by 500, rounding up, then multiplying by $0.55, with exemptions available for certain transfers like gifts or spouse transfers.
    • Cities like San Francisco and Los Angeles layer additional tiered or flat city transfer taxes on top of the county rate, which can raise total costs into five figures for multimillion-dollar properties.
    • Transfer tax responsibility is determined by negotiation, but most counties require sellers to pay, while city taxes vary and may be split, with escrow handling the calculation and remittance.
    • Buyers should estimate transfer tax early, confirm city rates before writing offers, and carefully review affidavit details, especially on high-value or complex transactions, to avoid costly mistakes.

    Ficustree
    Plan Your California Purchase Clearly
    Ficustree helps first-time buyers evaluate affordability, understand closing details, and move from home search to a clearer purchase decision.

    Explore Ficustree

    Table of Contents

    What Is California’s Transfer Tax and How Does It Work?

    Transfer tax, formally the documentary transfer tax, is an excise tax on the privilege of recording a deed that transfers ownership of real property. Every county in California collects it, and the amount is tied directly to what the property sold for, not its assessed value under Prop 13.

    The statutory rate comes from the Documentary Transfer Tax Act: $0.55 for every $500 of consideration, or a fraction of $500. Most escrow officers and title companies express it as $1.10 per $1,000 because the math is cleaner, but the two figures describe the identical rate.

    Here’s where it gets more complicated for buyers budgeting a purchase. That county rate is only the floor. Charter cities in California can set their own transfer tax rates independent of the county rate, and several of them do, sometimes dramatically. A $2 million home in unincorporated Sonoma County pays a very different transfer tax than the same home inside San Francisco city limits.

    How the tax gets calculated in practice

    Los Angeles County’s recorder explains that the tax applies whenever consideration exceeds $100, and the county collects it at the moment of recording, whether or not a city tax also applies. The LA County Recorder’s documentary transfer tax page walks through how the county acts as the collection point even for taxes that ultimately fund city budgets.

    For most buyers, the practical question isn’t the legal definition. It’s how much cash they need at the closing table, and who’s supposed to bring it.

    How to Calculate Transfer Taxes for Your California Purchase

    The formula sounds simple until the rounding rule catches you. California rounds up to the next $500 increment for any fractional amount, so a sale price of $500,001 gets taxed as if it were $500,500.

    Here’s the calculation walkthrough:

    1. Take the sale price and divide by 500.
    2. Round up to the next whole number if there’s any remainder, even a single dollar over a $500 line.
    3. Multiply by $0.55 to get the county documentary transfer tax owed.
    4. Add any city transfer tax if the property sits inside a jurisdiction with its own rate.
    5. Check for exemptions before finalizing, since certain transfers owe nothing at all.

    That third step where new money comes into play matters most in assumption sales. When a buyer takes over an existing mortgage rather than obtaining new financing, Napa County’s transfer tax guidance confirms the tax often applies only to the new consideration, not the full assumed loan balance. If a buyer assumes a $300,000 existing loan and pays $50,000 in new cash and equity, the taxable consideration in many cases is that $50,000, not the full $350,000 purchase price.

    Low-end example: A $350,000 condo in Fresno County, no city tax. $350,000 ÷ 500 = 700. 700 × $0.55 = $385 owed at recording.

    Mid-range example: A $750,000 single-family home in unincorporated Alameda County. $750,000 ÷ 500 = 1,500. 1,500 × $0.55 = $825, with no city layer added since the property sits outside Oakland or Berkeley city limits.

    High-end example: A $2,100,000 home inside San Francisco. The county portion alone is $2,100,000 ÷ 500 = 4,200 × $0.55 = $2,310. San Francisco’s own tiered city tax then applies on top of that county figure, which is where the total can jump substantially, sometimes into five figures. We’ll break down exactly how those city tiers work in the next section.
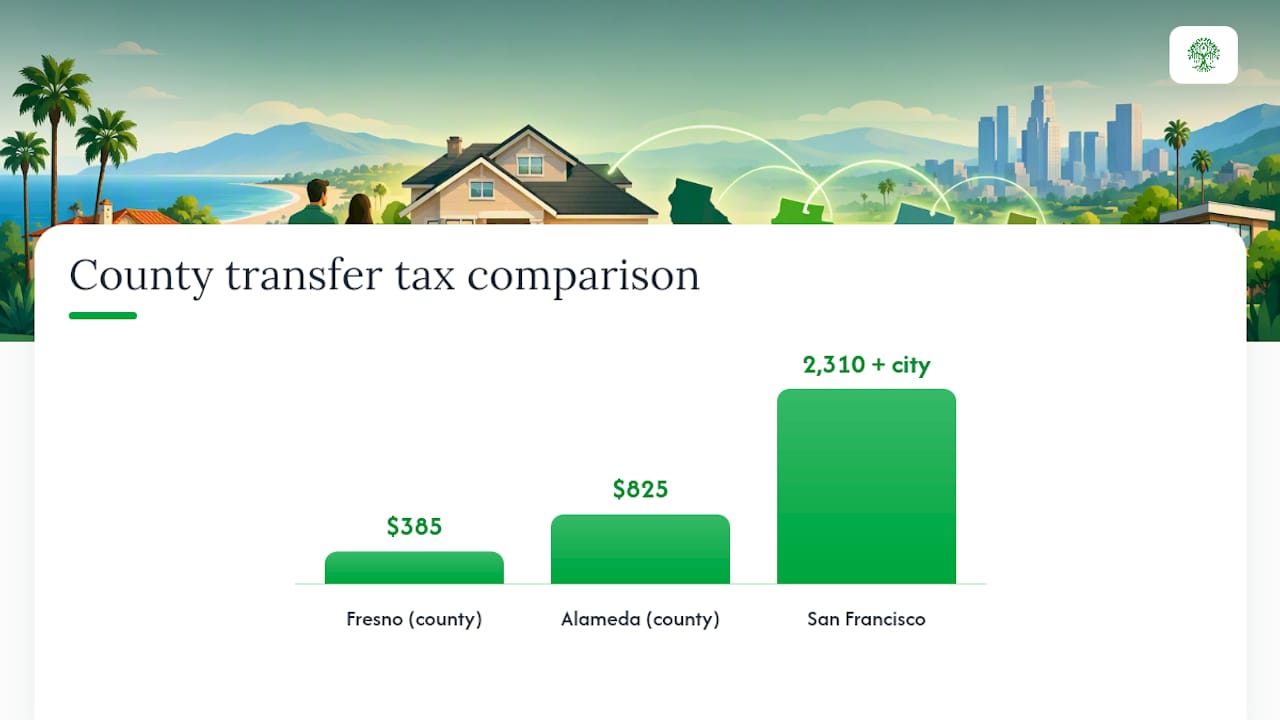
    Comparison of three California transfer tax examples

    Pro Tip: Run your transfer tax number before you write an offer, not after. A $10,000 to $30,000 swing on a high-value San Francisco or Los Angeles property can change what you’re willing to offer or what concessions you ask for.

    Who Pays Transfer Tax in California, and How Escrow Handles It

    California law doesn’t assign transfer tax to either party. The Revenue and Taxation Code stays neutral on who writes the check, which means it’s entirely a matter of local custom and contract negotiation.

    In most California counties, sellers customarily pay the county transfer tax. That’s tradition, not statute, and it varies by region. City transfer taxes get murkier: in San Francisco, the seller almost always pays by local custom, but in some Los Angeles-area transactions, buyers and sellers split city tax or negotiate it as part of the broader deal.

    Escrow and title companies handle the mechanics regardless of who pays. They calculate the tax based on the final sale price, collect the funds as part of the closing disbursements, and remit payment to the recorder at the moment the deed is recorded. Your settlement statement should show the exact transfer tax line item, broken out by county and city where applicable.

    Before signing, confirm these items with your escrow officer or agent:

    • The exact county and city transfer tax amounts appearing on your closing disclosure.
    • Which party the purchase contract assigns each portion to.
    • Whether the amount reflects full consideration or net consideration if a loan is being assumed.
    • That the county and city rates used match the property’s actual jurisdiction, not a neighboring one.

    If you want the seller to cover transfer tax as part of your offer, put it in writing. Standard California purchase agreements let buyers request that language directly, and SmartAsset’s guide to California transfer tax confirms this kind of negotiation is common enough that agents expect the ask. Our guide on asking for seller concessions in California walks through the exact phrasing that tends to work.

    Common Transfer Tax Exemptions and How to Claim Them

    Not every deed transfer owes tax. Revenue and Taxation Code Section 11930 lists several categories of exempt transfers, and knowing which one applies to your situation can save real money.

    The most common exemptions include:

    • Transfers between spouses, including as part of a marriage or upon divorce.
    • Gifts, where no money or consideration changes hands.
    • Transfers by death, such as when property passes through a will or trust distribution.
    • Transfers into a revocable living trust, when the trustor and beneficiary remain the same person.
    • Entity transfers that preserve ownership percentages, such as moving a property into an LLC where the ownership interests stay identical.

    Claiming an exemption isn’t automatic. The deed itself must carry the correct statutory recital, meaning the specific code section being claimed, along with any required signature or supporting documentation. Sonoma County’s recorder notes that missing or incorrect recitals are a frequent reason claims get rejected or flagged at recording, according to Sonoma County’s documentary transfer tax page.

    The entity-transfer exemption deserves extra caution. Under Revenue and Taxation Code Section 11925, the exemption for moving property into an LLC or partnership only holds if the ownership percentages stay exactly the same before and after the transfer. Bring in a new partner at a different split, and the exemption fails, making the whole transfer taxable.

    If you missed claiming a valid exemption at the time of recording, you generally need to work with the recorder’s office or a title company to file a correction and request a refund. This is one of the few spots where hiring a real estate attorney pays for itself; our guide on the role of a real estate attorney at closing covers when that call makes sense.

    Cities With Higher or Tiered Transfer Tax Rates

    San Francisco and Los Angeles don’t use the flat county rate. Both cities layer additional tax on top of the state base rate, and in San Francisco’s case, the rate climbs sharply as property value increases.

    San Francisco applies a tiered schedule where the tax rate rises in bands tied to the sale price, published on the city’s transfer tax page. A modest condo sale and a multimillion-dollar home sale in the same city can face transfer tax rates that differ by several multiples, not just a proportional increase.

    Los Angeles applies its own additional city tax on top of the county rate, and other cities across the state have followed similar patterns:

    • San Francisco: Tiered rate structure, with higher bands kicking in above set price thresholds.
    • Los Angeles: Additional city rate stacked on the county’s $0.55 per $500 base.
    • Culver City: Progressive tiers similar in spirit to San Francisco’s approach, scaled for its market.

    The legal mechanism behind this patchwork is the charter city distinction. Charter cities can set transfer tax rates independent of the state’s Documentary Transfer Tax Act, while general-law cities are more constrained. That’s why two cities twenty minutes apart can have wildly different transfer tax obligations on an identical sale price.

    Before you make an offer on a property in any major California metro, check the specific city recorder or city ordinance page, not just the county rate. Factor that city number into your closing cost estimate from the start, because it can shift your total cash-to-close by thousands of dollars.

    Filing the Transfer Tax Affidavit Without Errors

    Every recorded deed in California needs an accompanying transfer tax declaration, sometimes called a preliminary change of ownership report or transfer tax affidavit, that states the consideration paid and any exemption claimed.

    Here’s how the filing process typically works:

    1. The document preparer or escrow officer fills out the declaration, listing the assessor’s parcel number, total consideration, any assumed liens, and the exemption code if one applies.
    2. The buyer, seller, or their authorized representative signs it, affirming the figures are accurate under penalty of perjury.
    3. Escrow submits the declaration alongside the deed at the county recorder’s office when the transaction closes.
    4. The recorder collects the tax owed and records the deed, but critically, the recorder does not verify the calculation. Sonoma County’s recorder guidance confirms that responsibility for accuracy sits with the preparer, not the county.

    That last point matters more than most buyers realize. Because recorders collect based on the declared figure without auditing it, an incorrect consideration amount or a missing exemption citation can sit unnoticed for years, until a title issue, an audit, or a future sale surfaces the error. Keep your closing documents and any exemption paperwork on file indefinitely, since correcting a mistake later almost always requires proving the original transaction terms.

    Ficustree’s Take on Budgeting for Transfer Tax

    Transfer tax should show up in your affordability math from day one, right alongside PITI, HOA dues, and homeowners insurance. Buyers who wait until escrow to learn their city’s rate often get an unpleasant surprise on the closing disclosure.

    Follow three steps: estimate your county and city transfer tax as soon as you have a target price range, confirm the exact city rate with the recorder before you write an offer, and review the transfer tax affidavit line by line before it’s signed at closing.

    Ficustree’s buyer representation surfaces these numbers early in your search, not after you’ve fallen for a property. Anand and the Ficustree platform build closing-cost estimates, including transfer tax, into the affordability picture from the first showing, so you negotiate from real numbers instead of guesswork.

    Which Property Transfers Actually Owe Transfer Tax?

    Transfer tax applies specifically to recorded transfers of real property, meaning land and anything permanently attached to it, when consideration exceeds $100. Leases, even long-term ground leases, generally fall outside the tax because a lease doesn’t transfer fee ownership.

    Certain transfers avoid the tax entirely regardless of value. Foreclosure deeds to a lender, transfers securing a debt, and transfers that don’t actually change beneficial ownership, such as moving property into a straw entity that’s later moved back, can all fall outside taxable transfers. Mobile homes not permanently affixed to land typically aren’t subject to it either, since they’re treated as personal property rather than real property under most county rules.

    Commercial and residential sales both owe the tax identically, since the rate structure doesn’t distinguish by property type, only by consideration paid and jurisdiction. A $5 million commercial building and a $5 million residential estate in the same city face the same base calculation.

    Where readers get confused is assuming any change in a deed triggers tax. Adding a spouse to title, correcting a clerical error on a deed, or transferring into a trust where beneficial ownership doesn’t change are common scenarios that often owe nothing, provided the exemption is properly claimed and recited. The safest approach is treating every deed change as potentially taxable until you’ve confirmed otherwise with your title company or the exemption codes covered earlier in this guide.
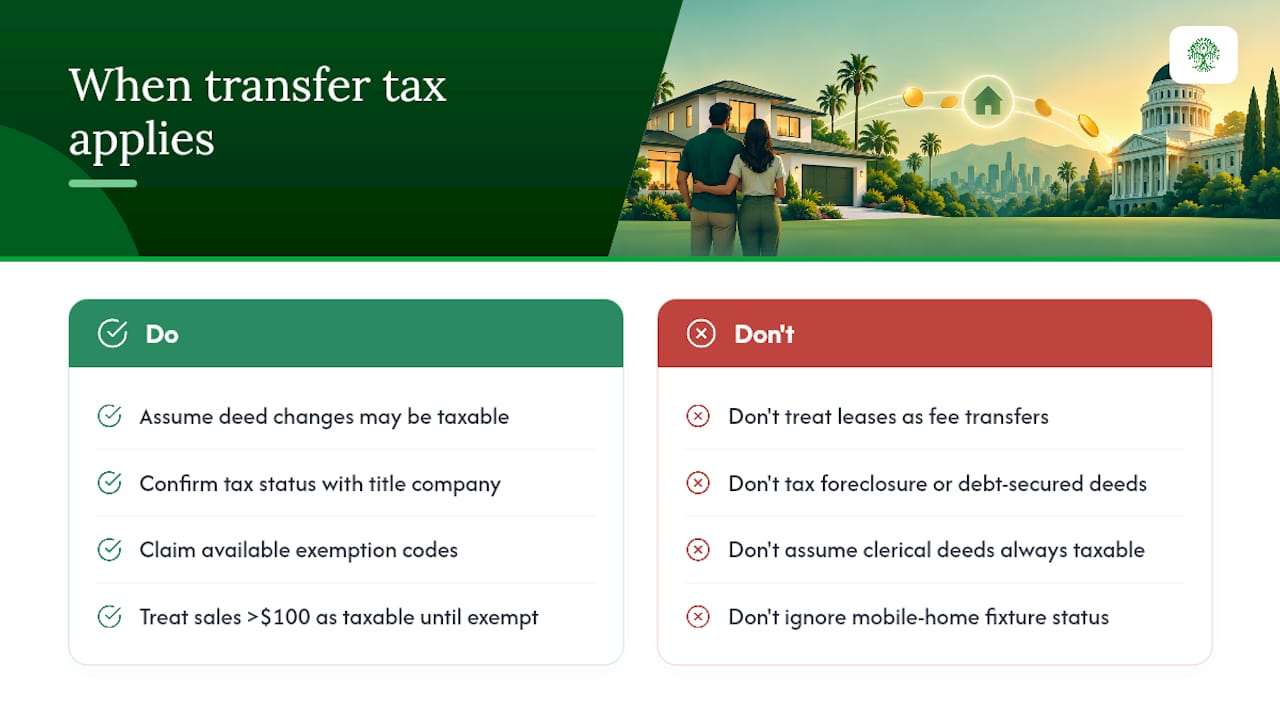
    Which Property Transfers Actually Owe Transfer Tax? — overview diagram

    Transfer Tax vs. Property Tax Reassessment and Recording Fees

    These three costs get lumped together constantly, and they’re entirely different animals. Transfer tax is a one-time excise tax paid at the moment a deed records, calculated on sale price. It has nothing to do with your ongoing property tax bill.

    Property tax reassessment is a separate event triggered by the same sale. Under Prop 13, California caps annual property tax increases at 2% of assessed value, but a change in ownership typically resets the assessed value to current market price. That reassessment drives your annual property tax bill for years afterward, while transfer tax is paid once and never again. Our breakdown of California property taxes covers how that reassessment actually works.

    Recording fees are a third, unrelated cost. These are flat administrative fees the county charges to physically record any document, deed included, regardless of value or consideration. They’re usually modest, often in the range of $20 to $100 depending on the county and document length, and they apply whether or not any transfer tax is owed at all.

    None of these three costs are the same as a documentary stamp tax, a term used in other states but not California’s own terminology, though it describes a functionally similar transfer tax concept elsewhere. If you see “stamp tax” referenced in a California closing document, it’s almost certainly being used loosely to mean the same documentary transfer tax discussed throughout this guide.

    What Happens If Transfer Tax Isn’t Paid Correctly?

    Recording a deed without paying the correct transfer tax creates real exposure, and it doesn’t go away once the deed is filed. Because county recorders collect based on the declared figure without independently verifying it, an underpayment can surface years later during a refinance, a future sale, or a title audit.

    When an error is caught, the county can demand the unpaid tax plus penalties and interest calculated from the original recording date, not the date the error was discovered. In cases where the underpayment appears intentional, such as deliberately understating consideration to reduce the tax owed, the declaration’s penalty-of-perjury language means the signer faces exposure beyond a simple back-tax bill.

    A related trap involves the popular idea of selling property to a family member for a token amount, like $1, to avoid transfer tax. This doesn’t work the way people assume. Recorders and courts look at fair market value, not the stated purchase price, when the sale is between related parties at a price far below market value. The IRS and county assessors treat that kind of transaction as a gift of the difference between the token price and actual value, which can trigger gift tax reporting obligations and still leave the parties owing transfer tax based on the property’s real worth, not the nominal $1 figure.

    The safer path for family transfers is using the documented gift exemption correctly, with the proper recital on the deed, rather than trying to disguise a gift as a nominal sale.

    Recent Changes Affecting California Transfer Taxes

    California’s transfer tax landscape keeps shifting at the city level even when the state statute stays fixed. The base $0.55 per $500 county rate has remained stable, but the real movement has come from charter cities adjusting their own additional rates through local ballot measures.

    Voters in several California cities have approved higher tiered transfer taxes in recent years specifically targeting higher-value property sales, following the model San Francisco established with its own tiered structure. These measures typically get framed as revenue tools for housing or homelessness programs, and they tend to concentrate the increase on sales well above median home prices rather than raising rates across the board.

    The practical lesson for buyers and sellers is that county rates are the stable baseline, but city rates are not something to assume stays constant year over year. Any time you’re transacting in a charter city, particularly one that has passed a housing-related ballot measure recently, verify the current rate directly with that city’s recorder or treasurer’s office rather than relying on a rate you saw quoted even a year or two earlier. Legislative changes at this level move faster than most statewide tax rules, precisely because they’re decided locally rather than through the state legislature.

    The Real Cost of Skipping the Transfer Tax Math

    Most first-time buyers treat transfer tax as a rounding error in their closing cost estimate, and in cities without a local add-on, that’s often fine. It stops being fine the moment you’re buying in San Francisco, Los Angeles, or another charter city with its own tiered schedule, where the gap between what you assumed and what you actually owe can run into five figures.

    The fix isn’t complicated: get the exact city and county rate before you write an offer, not after you’ve opened escrow. Negotiate who pays it explicitly in your contract rather than assuming custom will hold. And if your transaction touches a trust, an LLC, or a family transfer, get the exemption recital right the first time, because fixing it after recording is slower and more expensive than doing it correctly upfront.

    — Anand

    How Ficustree Helps You Get Ahead of Closing Costs

    Most buyers don’t find out their real transfer tax exposure until they’re deep in escrow, staring at a settlement statement with numbers they never budgeted for. Ficustree builds that number into your affordability picture from the first search, using AI-guided cost estimates that account for your specific city and county rate, not a generic statewide average.

    Ficustree

    Ficustree’s platform surfaces the affidavit details, the exemption questions, and the negotiation angles on seller-paid transfer tax well before you’re sitting in the escrow office wondering what you missed. If you’re actively house hunting in California and want that clarity from your very first showing, start with Ficustree’s buyer platform and see what a fully budgeted offer actually looks like.

    This article is general information, not a substitute for advice from a qualified financial advisor. Consult a qualified financial professional about your own circumstances before acting on anything here.

    Sources

    FAQ

    What is the transfer tax in California?

    California’s base documentary transfer tax is $0.55 per $500 of consideration, commonly written as $1.10 per $1,000. Cities like San Francisco and Los Angeles add their own tax on top of that county rate, sometimes with tiered schedules for higher-value sales.

    How to avoid transfer tax in California?

    You can’t avoid transfer tax simply by choosing a low sale price between related parties, since counties assess tax based on fair market value in those cases. Legitimate ways to avoid it include qualifying transfers between spouses, gifts, transfers into a revocable trust, or entity transfers that preserve identical ownership percentages, as long as the exemption is properly recited on the deed.

    How do I calculate the documentary transfer tax in California?

    Divide the sale price by 500, round up to the nearest whole number for any fractional amount, then multiply by $0.55 to get the county tax owed. Add any applicable city tax on top, and check whether a mortgage assumption limits the taxable amount to just the new consideration, as Napa County’s guidance explains.

    Can I sell my house to my son for $1?

    You can record a deed at any stated price, but the county will still calculate transfer tax and any gift tax exposure based on the property’s actual fair market value, not the $1 figure. The safer route for family transfers is documenting it properly as a gift using the statutory gift exemption rather than disguising it as a nominal sale.

    Does Ficustree help with transfer tax and closing cost estimates?

    Yes. Ficustree’s buyer representation platform builds city and county transfer tax estimates into your affordability picture from the start of your search, and its $1,000 flat fee plus 1% commission structure is designed to give first-time buyers clearer visibility into total closing costs than a traditional agent relationship typically offers.

  • California Buyers, Sellers, Landlords: 10 Day Lead Disclosure Checklist

    California Buyers, Sellers, Landlords: 10 Day Lead Disclosure Checklist

    If a home was built before 1978, California sellers and landlords must disclose any known lead-based paint and hazards, hand over the EPA pamphlet and required contract attachments, and give buyers a 10-day inspection window. This obligation exists on top of California’s own transfer disclosure rules. Skipping any piece of it, from the Lead Warning Statement to the signed acknowledgment, exposes sellers and landlords to real legal and financial risk.


    TL;DR:

    • Sellers and landlords must provide the EPA pamphlet, disclose known lead hazards, and obtain signed acknowledgments before finalizing pre-1978 property transactions.
    • California adds requirements by demanding a separate disclosure form and requires recordkeeping for three years, with lease renewals resetting disclosure duties.
    • Buyers have a 10-day window to conduct lead testing, but a disclosure statement confirming no known hazards does not guarantee the absence of lead presence.
    • Common compliance mistakes include missing the EPA pamphlet, failing to get signatures, or neglecting to follow the special timing rules for disclosures and inspections.
    • Penalties for non-compliance can involve civil fines and legal damages, even if no lead hazards are found, emphasizing the importance of thorough documentation.

    Ficustree
    Make Sense of Home Disclosures
    Ficustree helps California buyers analyze disclosures and make clearer decisions throughout the home purchase process.

    Explore Ficustree

    Table of Contents

    What Is Lead Paint Disclosure in California?

    Lead paint disclosure California requirements come from two overlapping layers of law: a federal rule that applies nationwide, and California-specific statutes that add extra paperwork and timing rules. Understanding both is the only way to actually get this right, because meeting one without the other still leaves you exposed.

    The Federal Rule Behind Every Transaction

    The baseline comes from the Lead-Based Paint Disclosure Rule under Title X, Section 1018. It applies to nearly every home and rental built before 1978, which the rule calls “target housing,” and it covers private sales, federally owned property, and most federally assisted housing. This rule does not require anyone to test for lead or fix anything they find. It only requires honesty about what the seller or landlord already knows.

    Under Section 1018, sellers and landlords must:

    • Disclose any known lead-based paint or lead hazards on the property.
    • Hand over all available records and reports related to lead in the home.
    • Include a signed Lead Warning Statement in the purchase contract or lease.
    • Provide the EPA pamphlet, “Protect Your Family From Lead in Your Home.”
    • Give buyers a 10-day period to test for lead before they’re locked into the deal.

    Signed acknowledgment forms have to be kept for three years. Skip any one of these steps and the transaction is technically out of compliance, even if the house turns out to be lead-free.

    How California Layers On Top of Federal Law

    California doesn’t replace the federal rule. It adds to it. Under Civil Code Sections 1102 through 1102.19, sellers must complete a Real Estate Transfer Disclosure Statement (TDS) that covers known environmental hazards, lead included. Many sellers satisfy part of this obligation by providing California’s Residential Environmental Hazards booklet alongside the TDS.

    A few things trip people up here:

    • The TDS and the federal Lead Warning Statement are separate documents. Both are required, not one instead of the other.
    • California Association of Realtors contract language often sets the specific timing for when disclosures land relative to offer acceptance, and that timing has to preserve the buyer’s federal inspection rights.
    • Inspectors performing lead risk assessments in California need state certification, and the California Department of Public Health maintains a list of certified professionals.

    Buyers reviewing these forms should read our guide to California buyer disclosures for a line-by-line breakdown of what’s at stake in each section.

    Seller and Landlord Duties: What to Provide and Keep

    Meeting your obligations comes down to a short, specific sequence:

    1. Hand the buyer or tenant the EPA pamphlet before they’re bound to a contract.
    2. Disclose any known lead paint or hazards, and attach whatever records or reports you have.
    3. Include the Lead Warning Statement directly in the purchase contract or lease addendum.
    4. Get signatures from every party acknowledging they received the disclosure.
    5. Keep copies of everything, signed and dated, for at least three years.

    Electronic delivery is generally acceptable if the recipient has consented to it, but paper with a physical signature is still the safest default for landlords managing multiple units. If a tenant refuses to sign, document the delivery attempt anyway, ideally with certified mail and a return receipt, and file that proof with your transaction records. Multiunit buildings need to address common-area hazards too, and lease renewals can trigger a fresh disclosure requirement if the tenancy terms change materially.

    Pro Tip: Set a calendar reminder for lease renewal dates. A surprising number of landlords disclose properly at move-in, then forget the obligation resets when a lease is renewed or a new tenant signs on.

    How Should Buyers Use Their 10-Day Inspection Window?

    Buyers get a reasonable inspection period, agreed in writing by both parties, to schedule a lead inspection or risk assessment before finalizing the deal. That window can be shortened, extended, or waived entirely, but the waiver has to be in writing to count.

    It helps to know the difference between the two kinds of testing available. A paint inspection tells you whether lead-based paint is present. A risk assessment goes further, identifying actual hazards like deteriorating paint, contaminated dust, or soil, and typically costs more because it’s a deeper evaluation. Certified inspectors for either service are listed through the CDPH.

    Lead inspection and risk assessment comparison

    The biggest misconception buyers carry into this process: a disclosure statement is not an inspection. A seller checking “no known lead-based paint” on a form means exactly that. They don’t know of any. It says nothing about what a certified inspector might actually find once given access to the home.

    Exemptions, Common Mistakes, and Enforcement

    Not every transaction falls under these rules. The main exemptions include:

    • Foreclosure sales.
    • Leases of 100 days or less (short-term rentals).
    • Housing certified lead-free by a state-certified inspector.
    • Housing designated for elderly or disabled residents where no children under six are expected to live.

    The most common compliance failures are missing the EPA pamphlet entirely, skipping the signed acknowledgment, or forgetting that a lease renewal resets the clock. Violations can be reported to CDPH or EPA without needing to prove lead actually exists in the home. Missing paperwork alone is a violation, and penalties can include civil fines and, in serious cases, triple damages in a lawsuit.

    A Step-by-Step Checklist and Where to Get the Forms

    Run through this sequence for any pre-1978 sale or lease:

    1. Confirm the build date and whether the property qualifies as target housing.
    2. Pull together any existing lead records, reports, or inspection results.
    3. Deliver the EPA pamphlet and attach the Lead Warning Statement to the contract.
    4. Offer the buyer or tenant the 10-day inspection period, in writing.
    5. Collect signed acknowledgments from every party involved.
    6. Retain all signed documents for three years, and keep proof of delivery if anyone refused to sign.

    Official materials worth bookmarking:

    If you’re mapping this against the broader offer timeline, our guide to how the offer process works in California shows exactly where disclosure deadlines fall relative to acceptance.

    How Ficustree Helps Buyers Verify Disclosures

    A buyer representative’s job at this stage is straightforward: check that the pamphlet was delivered, the Lead Warning Statement is attached, and the acknowledgment is signed and dated. Missing any of these should stop a transaction cold until it’s fixed. Platforms can flag gaps in disclosure packets as they come in, and assist first-time buyers in arranging certified inspectors within the 10-day window to avoid last-minute scrambling. That kind of paperwork check is exactly where first-time buyers get burned, and exactly where guided representation earns its keep.

    How Ficustree Helps Buyers Verify Disclosures — overview diagram

    Why Documentation Beats Verbal Assurances

    A verbal “the house is fine” from a seller carries zero weight once escrow closes. A signed disclosure does. Treat every lead disclosure form as leverage, not a formality: buyers should use their inspection rights aggressively, and sellers should document delivery attempts the moment a tenant or buyer balks at signing. First-time buyers in particular benefit from having someone check this paperwork line by line, because the mistakes that trip up new buyers rarely show up until after the deal is done.

    — Anand

    Get Disclosure and Inspection Support From Ficustree

    Reviewing lead disclosures, chasing down certified inspectors, and tracking a 10-day countdown is exactly the kind of task that eats into a first-time buyer’s bandwidth during an already stressful transaction. Ficustree is built for this. Instead of leaving you to interpret dense TDS language alone, Ficustree pairs you with direct buyer representation that checks disclosure packets for missing pieces, helps schedule certified lead inspectors before your window closes, and keeps every deadline visible in one place.

    Ficustree

    The premium platform, including affordability tools and disclosure tracking, is free to use. If you’re actively house hunting in California and want a second set of eyes on every disclosure before you sign, start with Ficustree’s buyer platform and see what’s already flagged on your next showing.

    Sources

    FAQ

    What Happens if I Don’t Disclose Lead Paint?

    Skipping required lead disclosure exposes sellers and landlords to civil penalties and, in serious cases, lawsuits carrying triple damages under federal law. Missing paperwork alone, like a missing pamphlet or unsigned acknowledgment, counts as a violation even if no lead is ever found, and it can be reported to CDPH or the EPA.

    Where Can I Find a California Lead Disclosure Pamphlet?

    The EPA pamphlet, “Protect Your Family From Lead in Your Home,” is available for free download through the EPA’s real estate disclosures page in multiple languages. Sellers and landlords must provide this to buyers or tenants before finalizing a pre-1978 sale or lease.

    Is California a Mandatory Disclosure State?

    Yes. California requires a Real Estate Transfer Disclosure Statement under Civil Code Sections 1102 through 1102.19, and this obligation applies on top of the federal lead paint disclosure rule for any pre-1978 property.

    Who Is Exempt From Lead-Based Paint Disclosure?

    Exemptions include foreclosure sales, short-term leases of 100 days or less, housing officially certified lead-free by a state-certified inspector, and housing for elderly or disabled residents where no children under six are expected to live. Every other pre-1978 sale or lease in California falls under the disclosure requirement.

    Do Sellers Have to Test for Lead Before Selling?

    No. Sellers only have to disclose what they already know and hand over any existing records. Testing and inspection are the buyer’s choice, exercised during the 10-day inspection window described in the federal disclosure rule.

  • California Earnest Money Law: 1–3% Deposits for First Time Buyers

    California Earnest Money Law: 1–3% Deposits for First Time Buyers

    Earnest money in California is refundable as long as you cancel while a valid contingency is still active and you follow the contract’s cancellation steps. Once you remove contingencies and back out anyway, the seller can often keep some or all of the deposit. Buyers typically put down 1% to 3% of the purchase price, and the funds sit in escrow, not with the seller, governed by California Civil Code §1057.3 and the CAR purchase contract. The details on formatting, deadlines, and forfeiture risk follow below.


    TL;DR:

    • In competitive markets, offering closer to 2% or 3% of the purchase price increases the likelihood of acceptance and signals stronger commitment.
    • Contingency deadlines, typically 17 to 21 days, must be actively monitored and canceled in writing before expiration to keep your deposit refundable.
    • Proper documentation and timely withdrawal of contingencies prevent disputes that could lead to losing your earnest money, especially when a clause isn’t initialed correctly.
    • Since earnest money must be held in escrow and cannot be released without joint instructions or court order, timely and clear communication is essential during cancellation.
    • A deposit below 1% may make your offer less attractive and could risk your earnest money being viewed as insufficient for a serious offer.

    Ficustree
    Buy With Greater Clarity
    Ficustree helps first-time buyers in California understand the purchase decision with AI-powered guidance and direct buyer representation.

    Explore Ficustree

    Table of Contents

    What Is Earnest Money in California, and Who Holds It?

    Earnest money is a good-faith deposit that shows the seller you’re serious, and it gets credited toward your purchase price at closing rather than sitting off to the side as a separate fee. It never goes to the seller directly. It goes to a licensed escrow holder, a neutral party required under California’s escrow rules to protect both sides until the deal closes or falls apart.

    The CAR Residential Purchase Agreement sets the default: your initial deposit must reach escrow within three business days of acceptance. You have a couple of routing options:

    • Deliver the deposit check or wire directly to escrow yourself.
    • Hand it to your agent, who must log it in the broker’s trust fund account before forwarding it.

    Escrow will not release a dollar of that deposit to anyone without joint written instructions from both buyer and seller, or a court order. That neutrality is the whole point. It’s also why disputes tend to drag on when one side refuses to sign off.

    How Much Earnest Money Do You Actually Need in California?

    There’s no legal minimum. The customary range across California is 1% to 3% of the purchase price, and your actual number should reflect your market and your comfort level, not a rule carved into the contract.

    Here’s what that looks like in real dollars:

    • $400,000 home: $4,000 to $12,000
    • $700,000 home: $7,000 to $21,000
    • $1,200,000 home: $12,000 to $36,000

    In competitive submarkets like parts of the Bay Area or coastal Los Angeles, sellers often expect offers closer to the 2% to 3% end, since a bigger deposit signals a buyer who’s less likely to walk. In slower markets, 1% to 2% is usually plenty. The number is negotiable, but treat it as a floor you can comfortably fund. If your offer gets accepted and you later need to increase the deposit as part of a counteroffer or contingency negotiation, you’ll want cash ready, not scrambling.

    When Can You Get Your Deposit Back? Contingencies and Deadlines

    Your earnest money stays refundable as long as a contingency protecting you is still active and you cancel before it expires. The CAR RPA builds in three standard windows:

    1. Inspection contingency, typically 17 days from acceptance, covering your right to investigate the property’s condition.
    2. Financing contingency, typically 21 days, protecting you if your loan falls through.
    3. Appraisal contingency, usually 17 to 21 days, protecting you if the home appraises below the purchase price.

    The rule that trips up first-time buyers most often: a contingency has to still be “active” when you cancel. Once you sign a removal (the CR form) or the deadline passes without action, that protection disappears, and canceling afterward puts your deposit at risk. Cancellation itself has to be timely and in writing, using the CAR Contingency Removal or Cancellation of Contract forms, not a text to your agent.

    Before you cancel, gather your paper trail:

    1. The inspection report showing the defect or concern.
    2. Written loan denial from your lender if financing fell through.
    3. The appraisal report if the value came in low.
    4. The HOA or title document revealing a problem you didn’t know about.

    Build a simple calendar the day you go into contract. Mark each contingency deadline, then set a reminder three days ahead so you’re never removing or canceling at the last minute.

    Pro Tip: Always ask escrow for a written confirmation once your cancellation and deposit release request are submitted. Verbal assurances from an agent don’t hold up if the seller later disputes the release.

    When Can You Get Your Deposit Back? Contingencies and Deadlines — overview diagram

    When Can a Seller Keep Your Deposit? Liquidated Damages Explained

    California law lets sellers keep a defined slice of your deposit as “liquidated damages” only when the contract’s clause meets specific formatting rules, and even then, it’s capped. Civil Code §1675 creates a rebuttable presumption that a liquidated damages clause is valid in a qualifying residential transaction, but only up to 3% of the purchase price.

    That presumption isn’t automatic. §1677 requires:

    • The clause be printed in a specific format (often bold or set apart from surrounding text).
    • Both buyer and seller separately initial the liquidated damages provision, not just sign the overall contract.
    • The amount stay within the 3% ceiling to get the legal presumption of validity.

    A larger deposit does not hand a seller automatic rights to keep it. If a clause is missing initials, buried in fine print, or the amount exceeds what the statute presumes reasonable, the seller has to prove actual damages instead of relying on forfeiture.

    If the clause is invalid or missing, the seller can’t simply pocket the money. They have to prove actual financial harm from your default, a much higher bar than pointing to a signed line in the contract. Forfeiture disputes most commonly arise when a buyer removes all contingencies, then gets cold feet or a better deal elsewhere and refuses to close.

    How to Protect and Recover Your Earnest Money Deposit

    Most disputes over an earnest money deposit come down to missed paperwork, not a fight over who’s right. Handling the process correctly from day one solves most of the risk before it starts.

    1. Before you sign: Read the liquidated damages clause line by line. Ask your agent or a real estate attorney to explain it in plain terms, and don’t offer a deposit larger than you’re prepared to lose if something goes sideways.
    2. Right after acceptance: Get your deposit to escrow within the three-business-day window. Keep the wire confirmation or check receipt. If your agent is handling delivery, confirm it was logged in the trust account.
    3. If you cancel during a contingency: File the correct CAR cancellation form, attach your supporting documents (inspection report, lender denial, appraisal), and get escrow’s written confirmation that the release instructions were received.
    4. If escrow or the seller withholds your deposit: Send a written demand under Civil Code §1057.3, which gives the holder 30 days to respond. If they withhold funds without a good-faith dispute, you may be entitled to treble damages. Try mediation before filing suit. It’s faster and cheaper than litigation, and most escrow disputes resolve there.

    Pro Tip: Save every document related to your deposit in one folder from the day you open escrow: receipts, contingency removal forms, inspection reports, all of it. If a dispute arises six weeks later, that folder is what settles it fast.

    Force majeure language rarely appears in the standard CAR Residential Purchase Agreement, and where it doesn’t exist, buyers have to rely on the built-in contingencies instead of a separate “act of God” clause. The pandemic caused some California transactions to be delayed when lenders slowed underwriting, appraisers couldn’t access properties, or a buyer’s job situation changed overnight.

    In practice, financing and appraisal contingencies did most of the protective work during COVID-era disruptions. A buyer who lost income and couldn’t get a loan approved usually still qualified for a refund under the standard financing contingency window, as long as they canceled before removing it. The pandemic didn’t require a special clause. It just made the financing contingency far more important than usual.

    Some agents added custom addenda referencing pandemic-specific delays (closing extensions, remote appraisal access, delayed inspections), but these were negotiated case by case rather than standardized. If a future disruption, public health related or otherwise, threatens your closing timeline, the fix is the same: don’t remove a contingency until you’re certain the underlying condition is satisfied, and put any extension request in writing before a deadline passes.

    The lesson holds beyond COVID: contingency deadlines are your real safety net, not a hope that some emergency clause will bail you out later. If your transaction timeline looks tight for any reason, ask your agent about extending a contingency rather than letting it expire.

    Earnest Money vs. Security Deposits and Option Fees: What’s the Difference?

    Earnest money, security deposits, and option fees all involve handing over cash early, but they protect completely different things and follow different rules.

    Earnest money is a purchase deposit tied to a home sale contract. It gets credited toward your down payment or closing costs at closing, and it’s refundable under the contingency rules described above.

    A security deposit belongs to the rental world entirely. It’s collected by a landlord to cover potential damage or unpaid rent, governed by different statutes than a real estate purchase, and it has nothing to do with buying a home.

    An option fee is more common in states like Texas, where buyers pay a small, usually nonrefundable fee for the right to walk away from a contract during a set period, no reason required. California’s CAR contract doesn’t use this structure. Instead, California buyers get contingency periods (inspection, financing, appraisal) that function similarly, letting you exit for cause, but the deposit tied to those contingencies is still refundable when you cancel correctly, unlike a true option fee, which you pay regardless of outcome.

    Confusing these three trips up buyers moving from other states. If you’re used to a Texas option fee, don’t assume your California earnest money works the same way. It’s fully tied to the purchase agreement’s contingency structure, not a flat, nonrefundable access fee.

    Comparison of earnest money security deposits option fees

    What Do California Courts Say About Earnest Money Disputes?

    Most earnest money disputes in California never reach a courtroom. They get resolved through mediation, an escrow interpleader, or a simple written demand once one side realizes their position won’t hold up. The disputes that do escalate tend to follow a familiar pattern: a buyer removed contingencies, then tried to back out and claimed the removal was invalid or coerced, or a seller tried to invoke a liquidated damages clause that was never properly initialed under §1677’s formatting rules.

    When escrow can’t get both parties to agree on releasing funds, the holder can file an interpleader action, essentially handing the decision to a court and stepping out of the middle. This happens more often than buyers expect, and it’s slow. It can take months to resolve, which is exactly why a written demand under §1057.3 before things reach that point matters so much.

    The recurring theme in these cases is procedural, not dramatic. A seller who wants to claim forfeiture but skipped separately initialing the liquidated damages clause usually loses that claim, or has to fall back on proving actual damages instead. A buyer who canceled one day after a contingency deadline passed usually loses their refund claim, even if the underlying reason for canceling was legitimate. Timing and paperwork decide these disputes far more often than who was “more right.”

    Does Earnest Money Affect Your Loan Approval?

    Your earnest money deposit shows up on your loan application as part of the funds you’re bringing to the transaction, and underwriters do check it. Lenders want to see that the deposit came from a legitimate, documented source, not a cash gift you can’t explain or a loan from an undisclosed party.

    Underwriters typically ask for:

    • A copy of the canceled check or wire confirmation showing the deposit left your account.
    • Bank statements showing the funds were already sitting there (this is the “sourced and seasoned” requirement most lenders apply).
    • An explanation and paper trail for any large, sudden deposit into your account in the weeks before you made the offer.

    A deposit that can’t be traced to a documented source can slow down or even jeopardize your loan approval, because unexplained funds raise red flags around undisclosed debt or borrowed down payment money. Keep your earnest money in the same account for at least two months before you go into contract if you can, and avoid moving cash between accounts right before you write your offer. It makes the underwriting process considerably smoother, since your lender won’t need extra letters of explanation for money that just appeared.

    Ficustree’s View: Pair Your Deposit Strategy With a Contingency Calendar

    The buyers who lose earnest money almost never lose it over bad luck. They lose it because nobody built a calendar, nobody tracked the escrow paperwork, and a deadline slipped past unnoticed. Getting your affordability and pre-approval numbers locked before you write an offer changes how much deposit risk makes sense for your budget in the first place.

    A contingency calendar tied to your actual escrow file, not a mental note, closes most of the gap between “the law protects you” and “you actually kept your money.” That’s the difference between theory and outcome in nearly every dispute this guide covers.

    — Anand

    Get Guided Support Through Escrow With Ficustree

    Ficustree exists because most first-time buyers don’t need another listings site. They need someone tracking contingency deadlines and escrow paperwork so a missed form never turns into a lost deposit. Ficustree pairs you with direct buyer representation, on-demand showing agents, and a decision-intelligence platform that flags contingency windows before they close, all built around the goal of getting you to closing without the six-month scramble.

    Ficustree

    Under Ficustree’s model, buyers pay a $1,000 fee at closing plus 1% commission, and keep a rebate of roughly 2% where California law allows it, while the platform itself stays free to use. If you’re heading into contract soon, start by reviewing how the offer process works so your deposit strategy and contingency timeline line up from day one. Ready to move forward with representation that tracks your escrow deadlines directly? Start with Ficustree’s buyer platform and get your contingency calendar built before you write your next offer.

    Sources

    FAQ

    What Is the Earnest Money Rule in California?

    California requires earnest money to be held in a neutral escrow account, not with the seller, and released only through joint written instructions or a court order. Deposits typically reach escrow within three business days of acceptance under the CAR Residential Purchase Agreement, and the deposit stays refundable as long as an active contingency covers your cancellation.

    How Much Is Earnest Money on a $400,000 House?

    On a $400,000 home, typical earnest money in California runs $4,000 to $12,000, reflecting the customary 1% to 3% range. Competitive markets tend to push toward the higher end, while slower markets often see offers closer to 1%.

    What States Require Earnest Money?

    No state legally requires earnest money, including California. It’s a customary practice sellers expect as proof of a serious offer, and the amount and terms are set by the purchase contract rather than statute.

    Is $500 Earnest Money Good?

    A deposit much lower than the customary 1% to 3% of the purchase price could make your offer look less competitive to a seller weighing multiple bids.